The default white background in VideoScribe is perfect for the classic whiteboard animation style, but you can customize your background to create many different styles and themes!
There are several ways you can create a background for your scene:
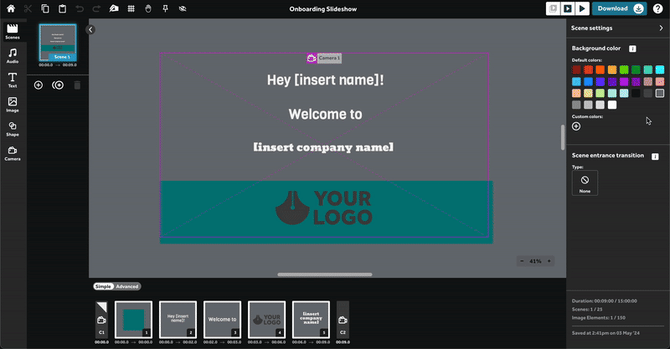
Adding a background color
The simplest way to customize your scenes is to add a background color:
- Select a scene in the left-hand panel, or click the background canvas to view the 'Scene settings' in the right-hand panel
- You can change the background color for each scene by selecting a 'Default color' or adding a 'Custom color'
Using custom colors
You can select and save your own custom colors in VideoScribe. These will appear in all your projects so you can quickly use the same colors for both backgrounds and elements.
- Select the
 symbol to add a custom color
 - You can choose a color or paste a hex code
- Select ‘Add color’ to add to your custom color palette
Top tip: If you no longer want the custom color, you can right-click the color and select ‘Delete’ to remove it.
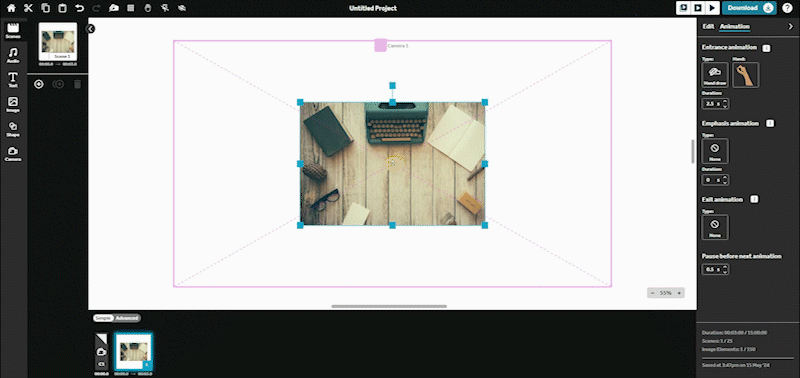
Using images as backgrounds
You can also use any image as a background. Check out the ‘Backgrounds and Scenery’ folder in the VideoScribe library for images that work well as backgrounds. Alternatively, you can import your own images, including photos.
- Add the image to the canvas - make sure it’s the first image in the timeline for the scene
- Resize the image to fill the camera view
- Set the background not to animate so it’s already there at the start of the scene:
- Select the image and click the ‘Animation’ tab in the right-hand panel
- Select ‘None’ for the 'Entrance animation'
It’s also a good idea to lock this image so it doesn’t move while you add other elements:
- Select the image and click the ‘Edit’ tab in the right-hand panel
- Select the ‘Lock’
 button
Top tip: You can also use different images as backgrounds for each camera view within a scene.
Using shapes as backgrounds
Shapes are a great way to add creativity to your animations.
- Click the 'Shape'
 button in the left-hand panel to add shapes - rectangles, circles, or triangles
 - Position the shapes within your camera view
- Change their color from the ‘Edit’ tab in the right-hand panel
- As above, you can lock these shapes and set them not to animate
Top tip: Try layering shapes over each other for a more abstract style. You can also position some of them partly outside the camera view.
Applying a color gradient
You can also apply a color gradient to shapes.
- Select the shape and click the ‘Edit’ tab in the right-hand panel
- In the ‘Appearance’ section, select ‘Gradient’ and choose between a ‘Vertical’ and ‘Horizontal’
- Customize the two gradient colors to match your video's theme and style
Top tip: Use a single rectangle to fill the camera view and apply a vertical gradient for a stylish background effect.