VideoScribe Legacy can make one image change into another, known as "morphing". This article will explain how...
Please note: VideoScribe Legacy is the older version of our software. We continue to support it, but we recommend switching to the latest version to enjoy the best features and performance.
If you are using the latest version of VideoScribe click here to read the article on Create Morph Animations in VideoScribe: Step-by-Step Guide.
Top tip: Check out our great blog post with morphing examples here.
Morph can be used to create many effects, see the videos above or tips and tricks at the bottom of this guide for some more ideas. In this example we are going to move an image across the screen, change the image and also make it bigger so you can see a combination of effects.
Step 1. Add and arrange the first image and set the camera.
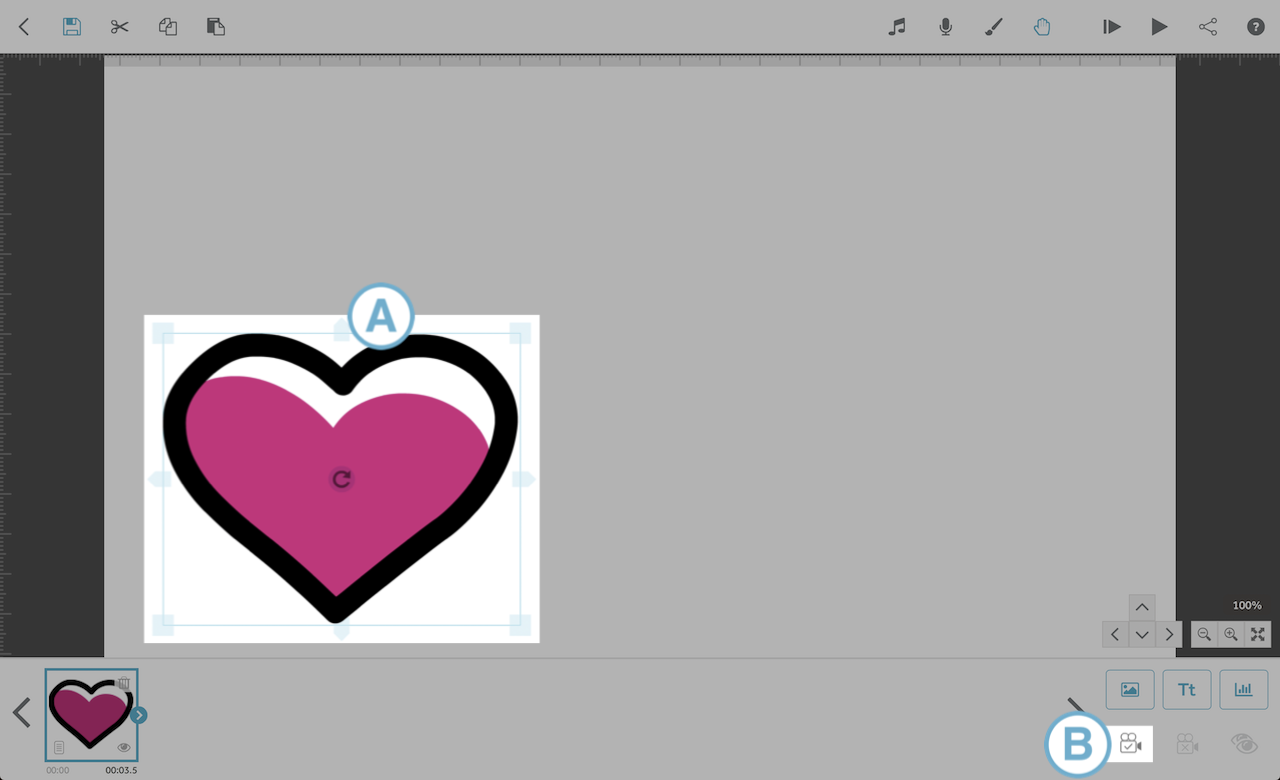
- The first image is the 'morph from' image (A). I have moved it to the lower left corner of the canvas and made it a bit smaller.
- With the image selected click the set camera icon (B).

Step 2. Add a second image to the canvas and set the camera.
- This will be the 'morph to' image.
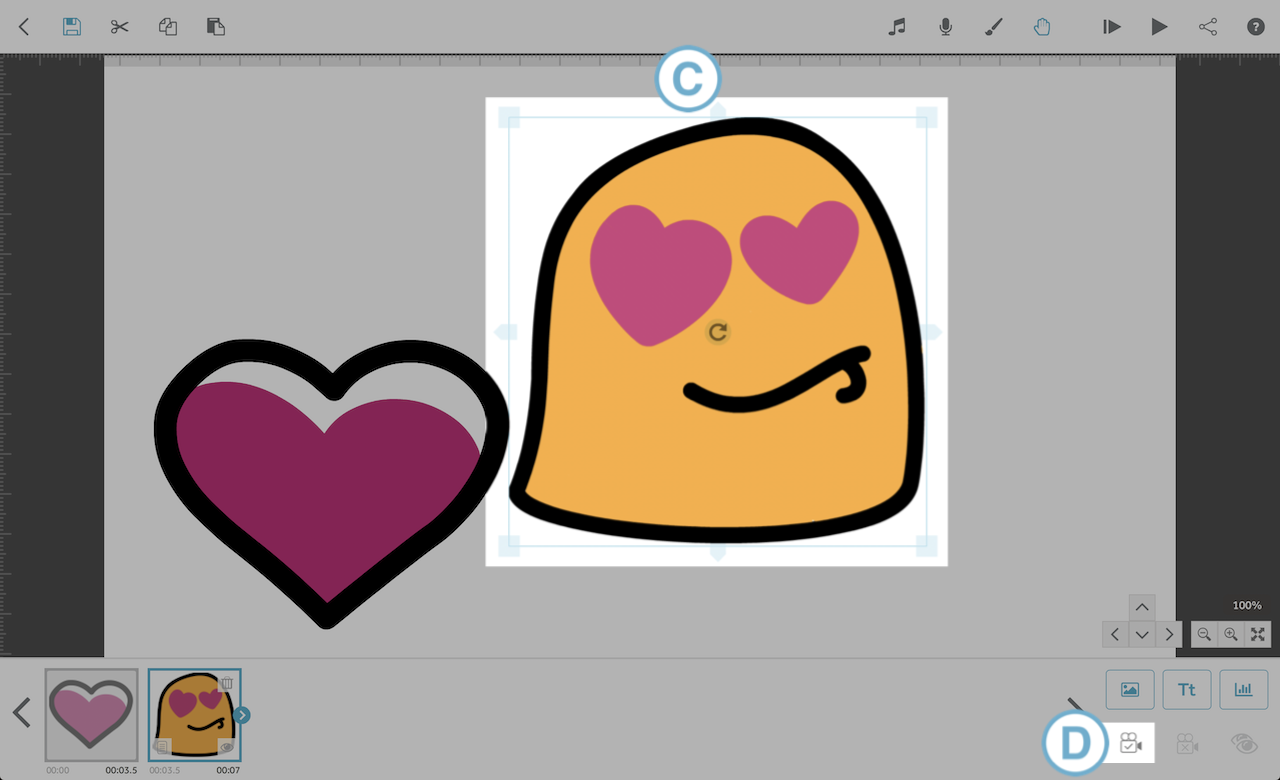
- Place the second image where you would like the morphing image to finish (C). Move it a little to the right and make it larger.
- With the second image still selected, click the set camera icon (D)

Step 3. Set the image properties for the first image to 'Outline'.
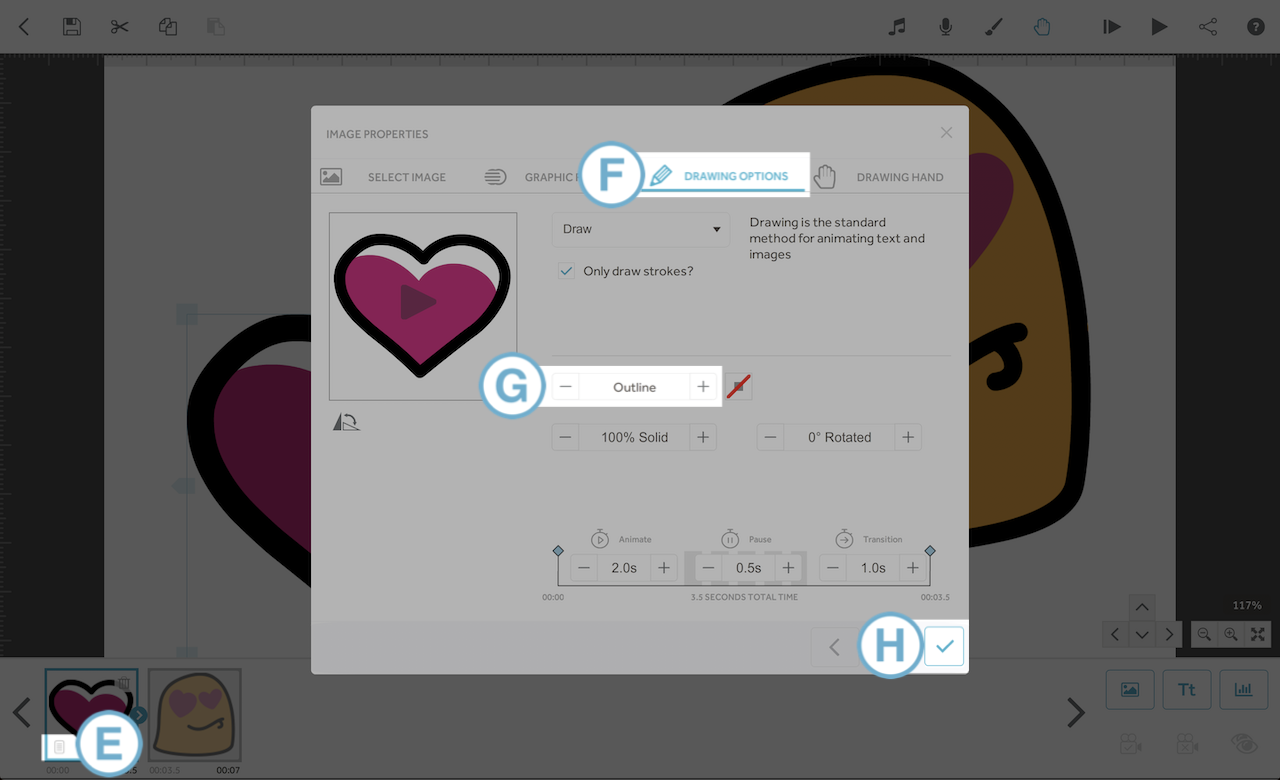
- Open 'Image properties' for the first image by selecting it in the timeline and clicking 'Element Properties' (E). You can also open the properties by either double clicking the image thumbnail in the timeline or by double clicking the image on the canvas.
- Make sure 'Drawing Options' is selected (F).
- Change the image from 'Full colour' to 'Outline' (G).
- Click the tick icon to save (H).

Step 4. Set the image properties for the second image to Morph.
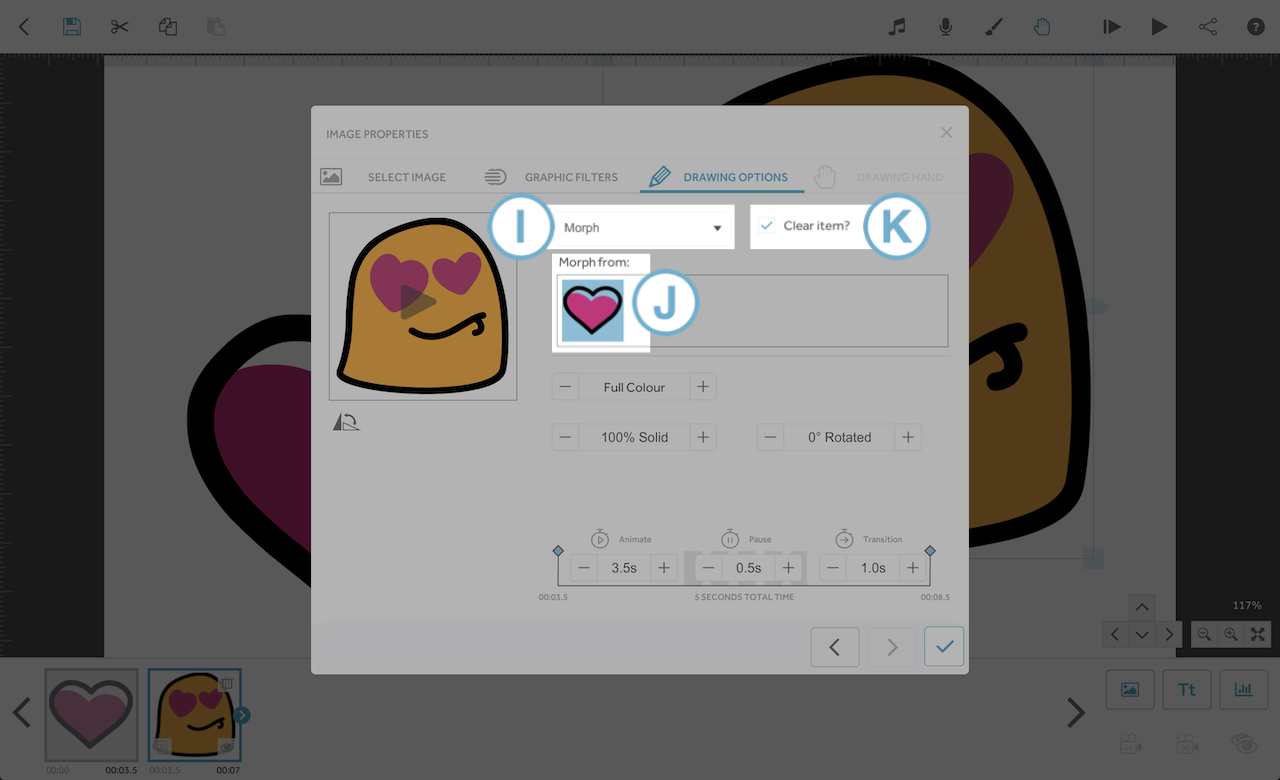
- Open the 'Drawing Options' for the second image, change the animate effect from 'Draw' to 'Morph' using the drop down menu (I).
- Choose the first image from the options given under 'Morph from' (J). Check the 'Clear Item' box (K) to ensure the first image is not left behind.

Step 5. Adjust the animate time, select the tick to finish and then play your scribe.
- You will now see in the preview that the first image is drawn then it morphs into the second image by moving across the screen, getting larger and changing into the new image.
Top tips for morphing:
- To morph in multiple stages, simply duplicate the second image and repeat the process with each image that comes afterwards.
- Morph two of the same image to move it across the screen or change its size.
- Morph two different images to make one blend into the other.
- Morphing works best with simple-lined SVG images.
- Morphing is not available for text elements.
- The morph option will not be available for the first image element in your timeline because there is nothing for it to morph from.
- Morphing will not work with imported JPG or PNG images and does not work on animated GIFs.
