By default VideoScribe will draw each element in the centre of the screen. We call this the camera position and you can customise this to control how an element appears on screen.
Each image and text element you add to the canvas has a camera position set to it. The default camera position given to an element is in the centre and mostly filling the camera view. Once you set a camera position, other than the default for an element, you can move that element around on the canvas and the camera will remain where it is when the image is drawn.
Setting a zoom level and camera position
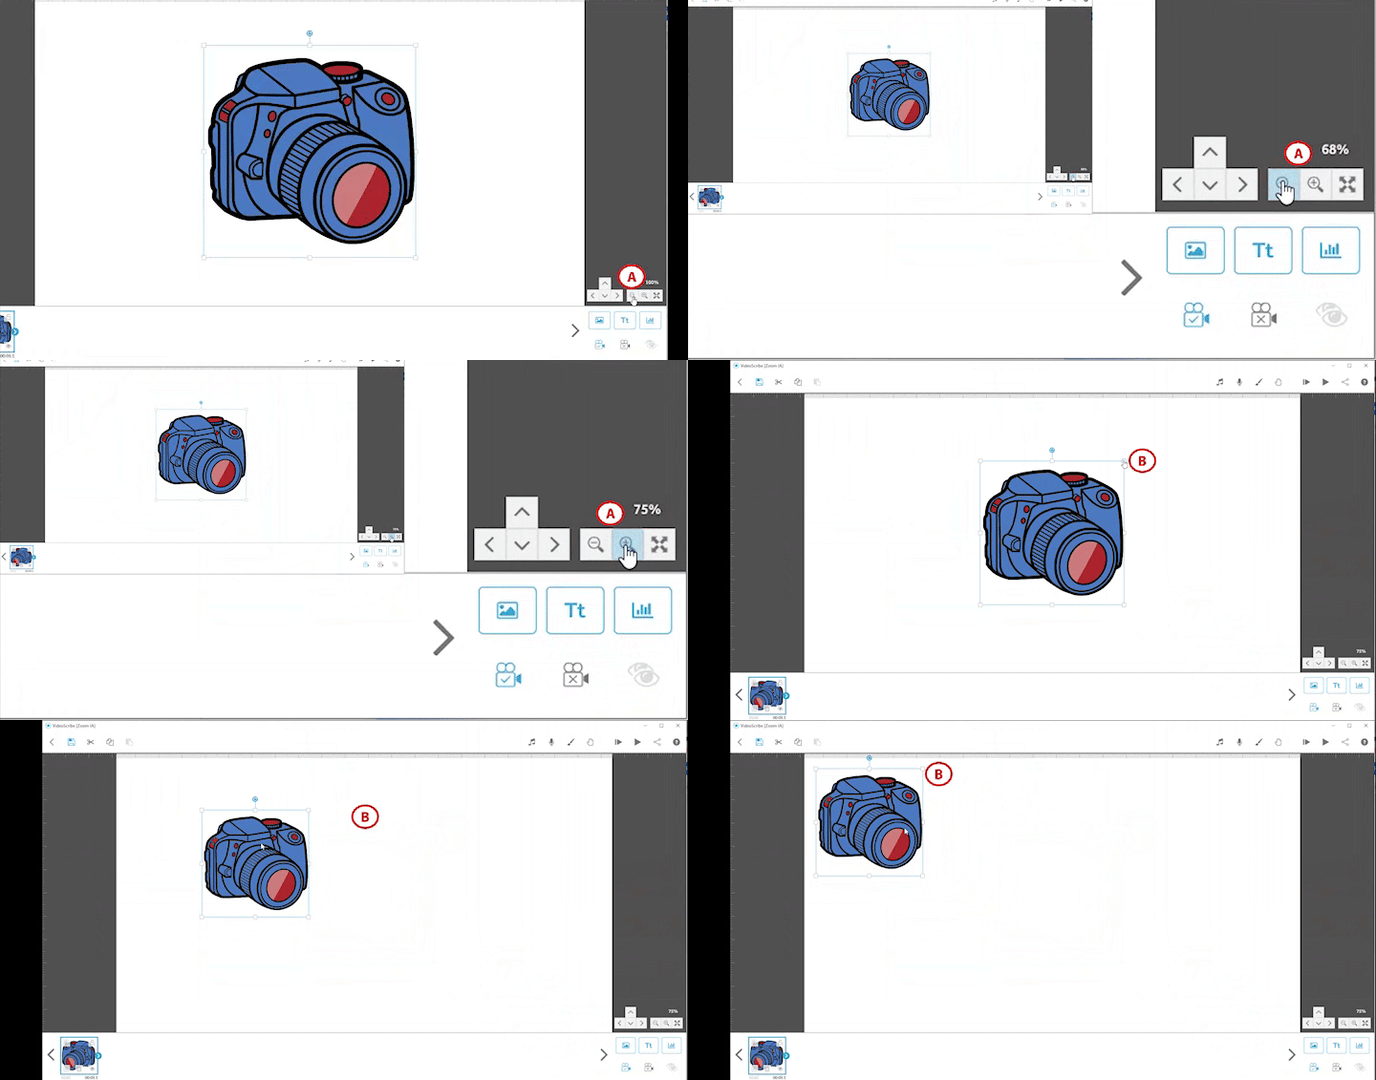
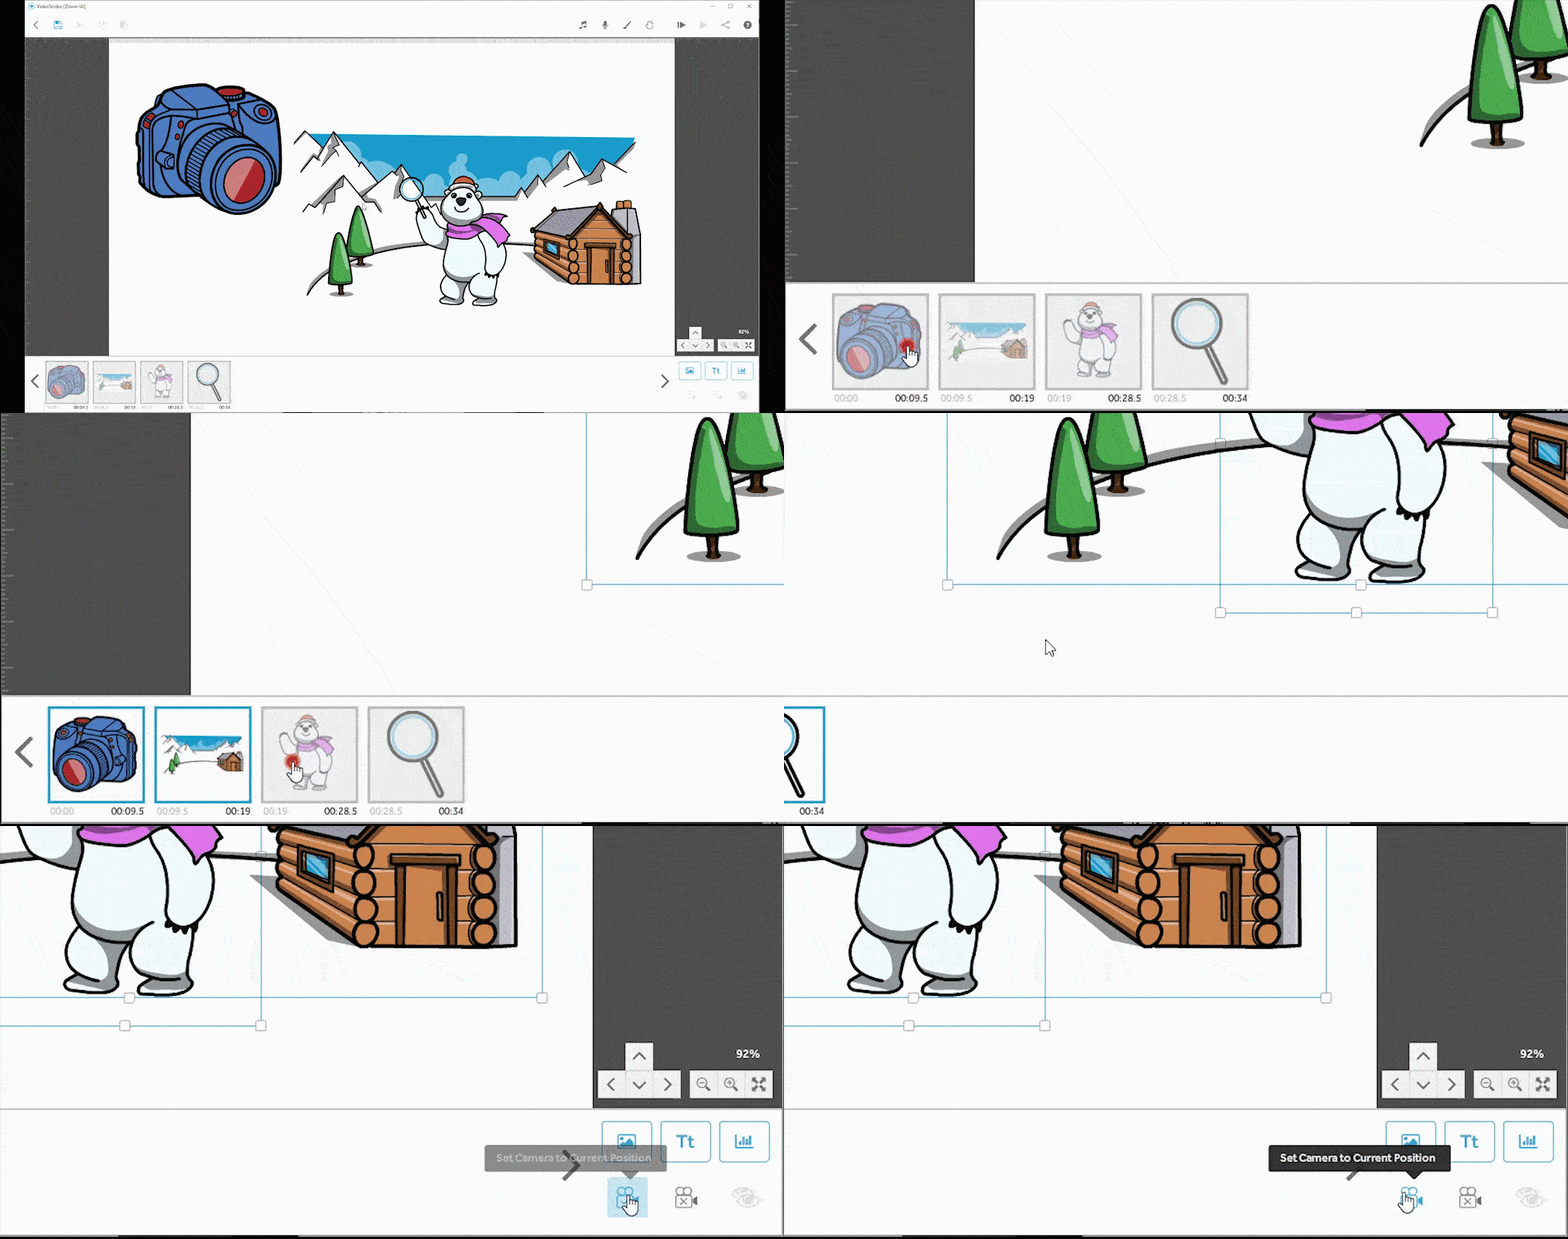
Use the + and - buttons (A) or mouse scroll wheel to set the canvas to the zoom level that you want. Size your element and place it where you want on the canvas (B).
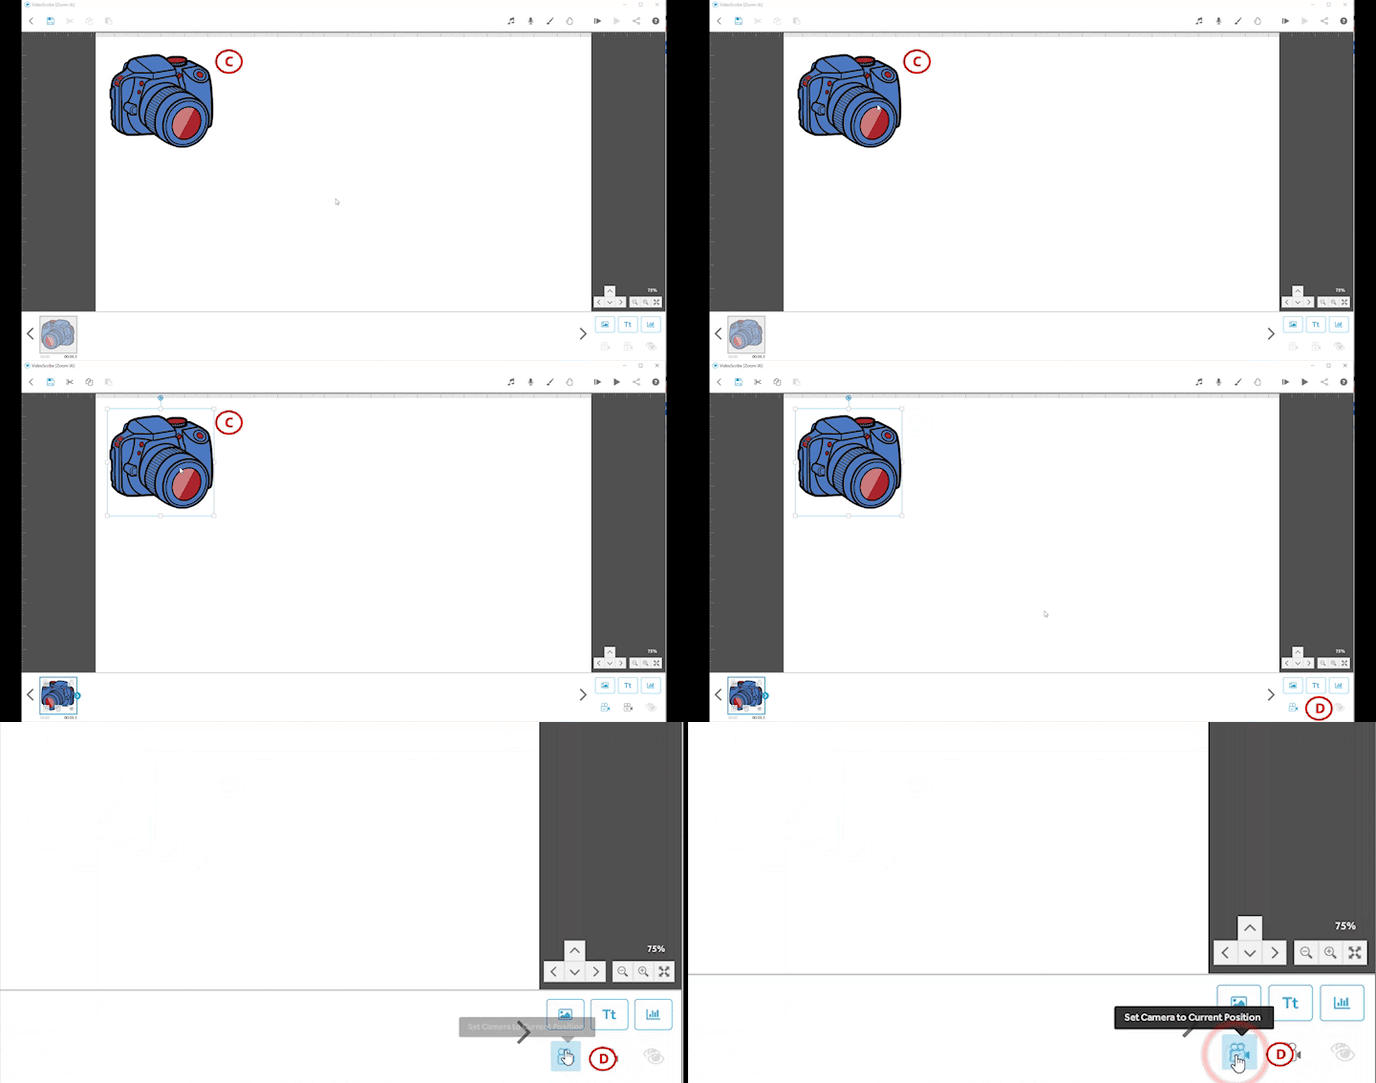
With the image selected (C), set the camera position using the ‘Set camera’ icon (D).
This image will now be drawn in your video in the size and position you have set
Clear a camera position
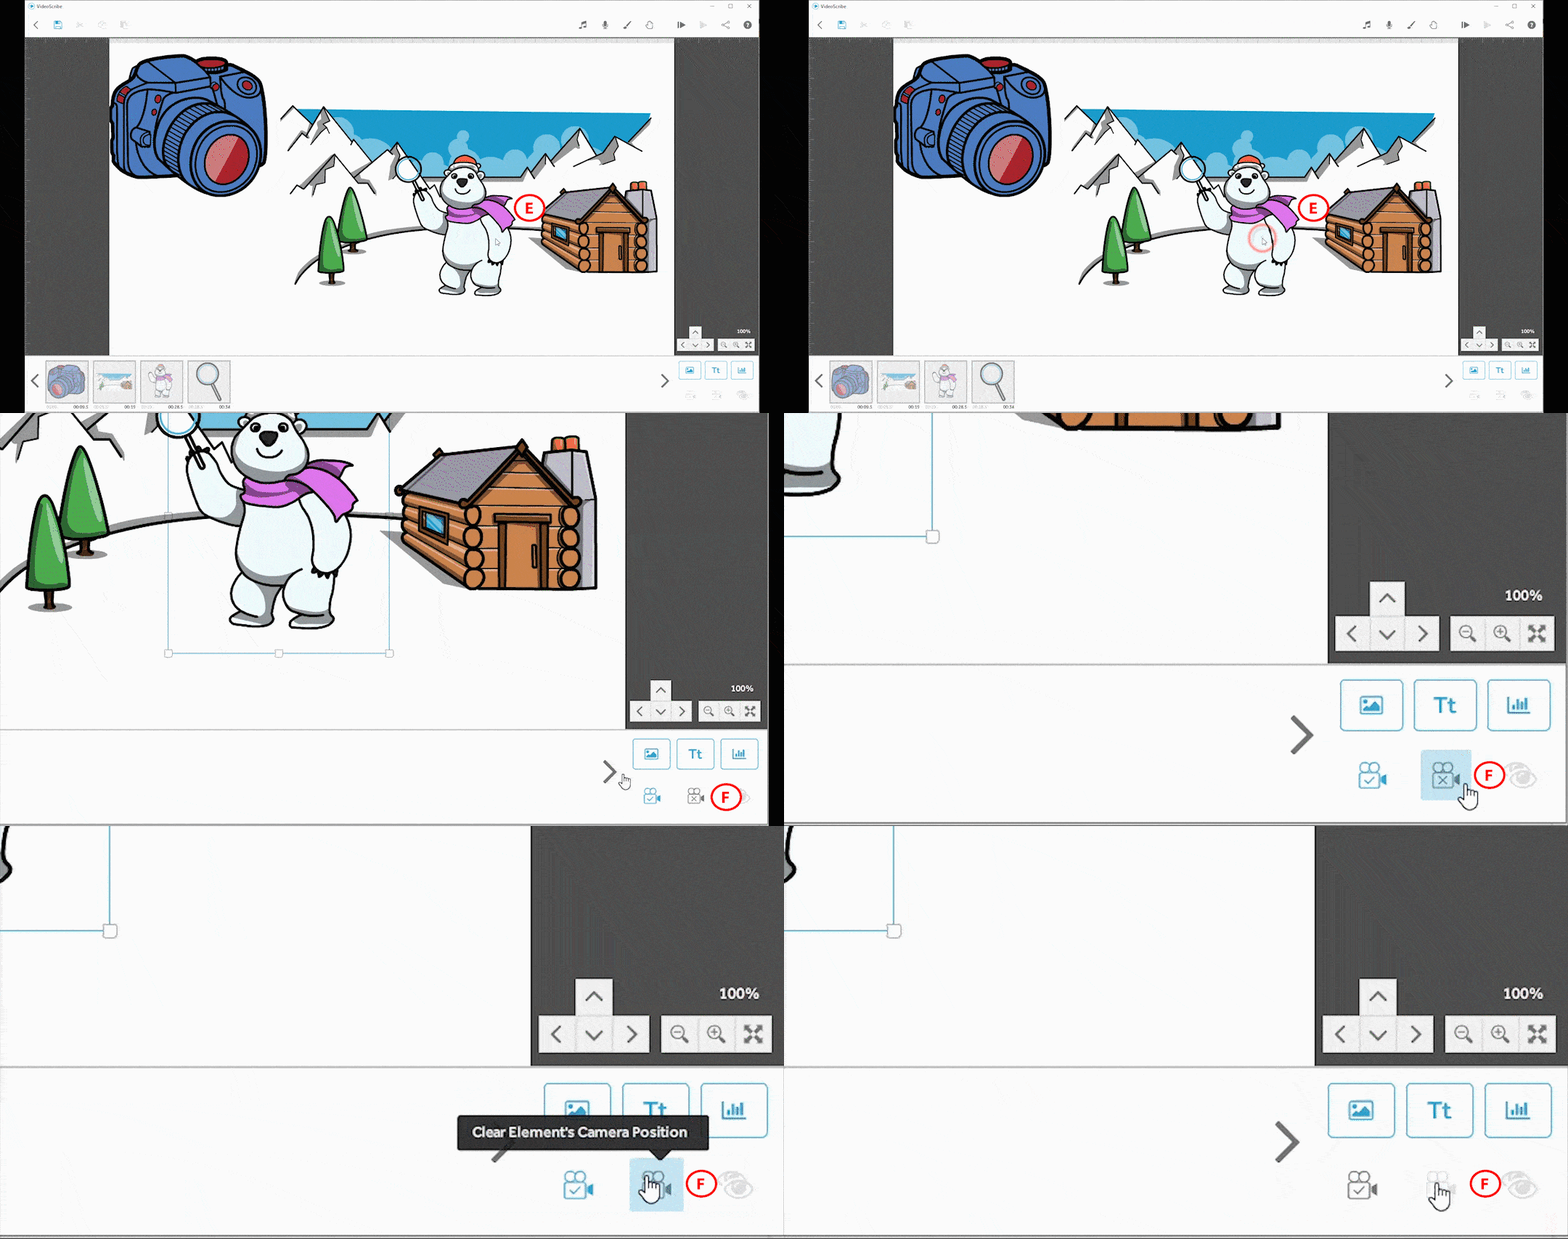
A camera position can be removed for an element, or group of elements and set back to the default, by selecting the element(s) (E) and clicking the 'Clear camera position' icon (F).
Remove the final zoom
To stop the scribe zooming out at the end:
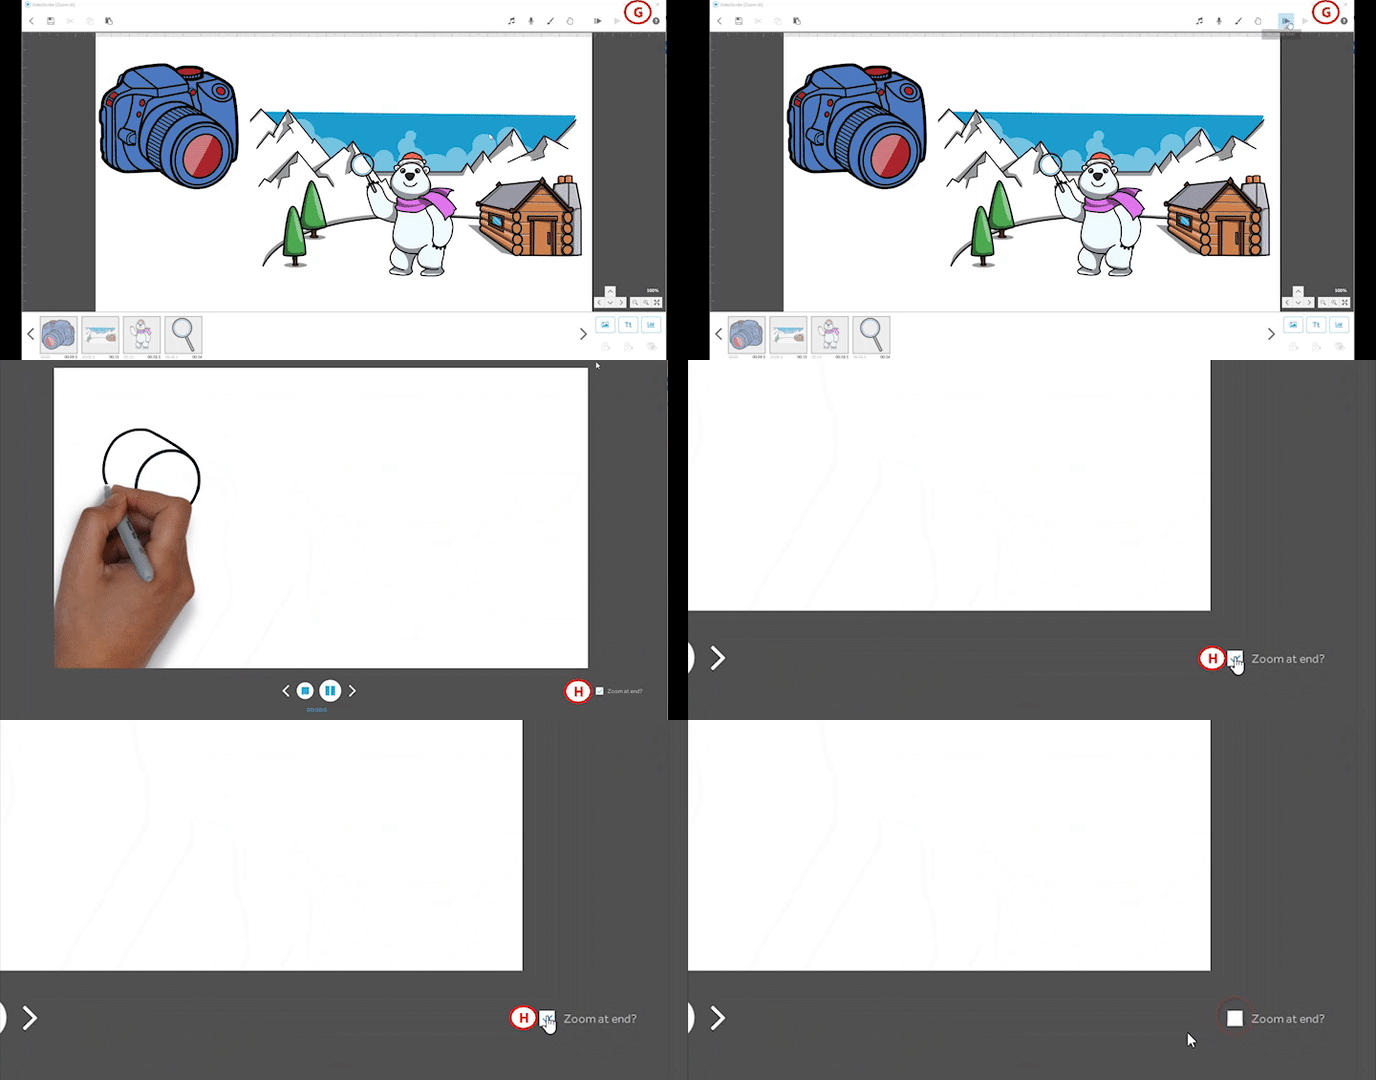
Click the 'Play from start' icon (G) and untick the 'Zoom at end?' box (H).
If you need to hold the final zoomed-out shot at the end of your scribe, follow these steps.
Step 1. Untick the 'zoom at end' box as described above.
Step 2. Add a new, simple element right at the end of your timeline, and away from the other elements on your canvas.
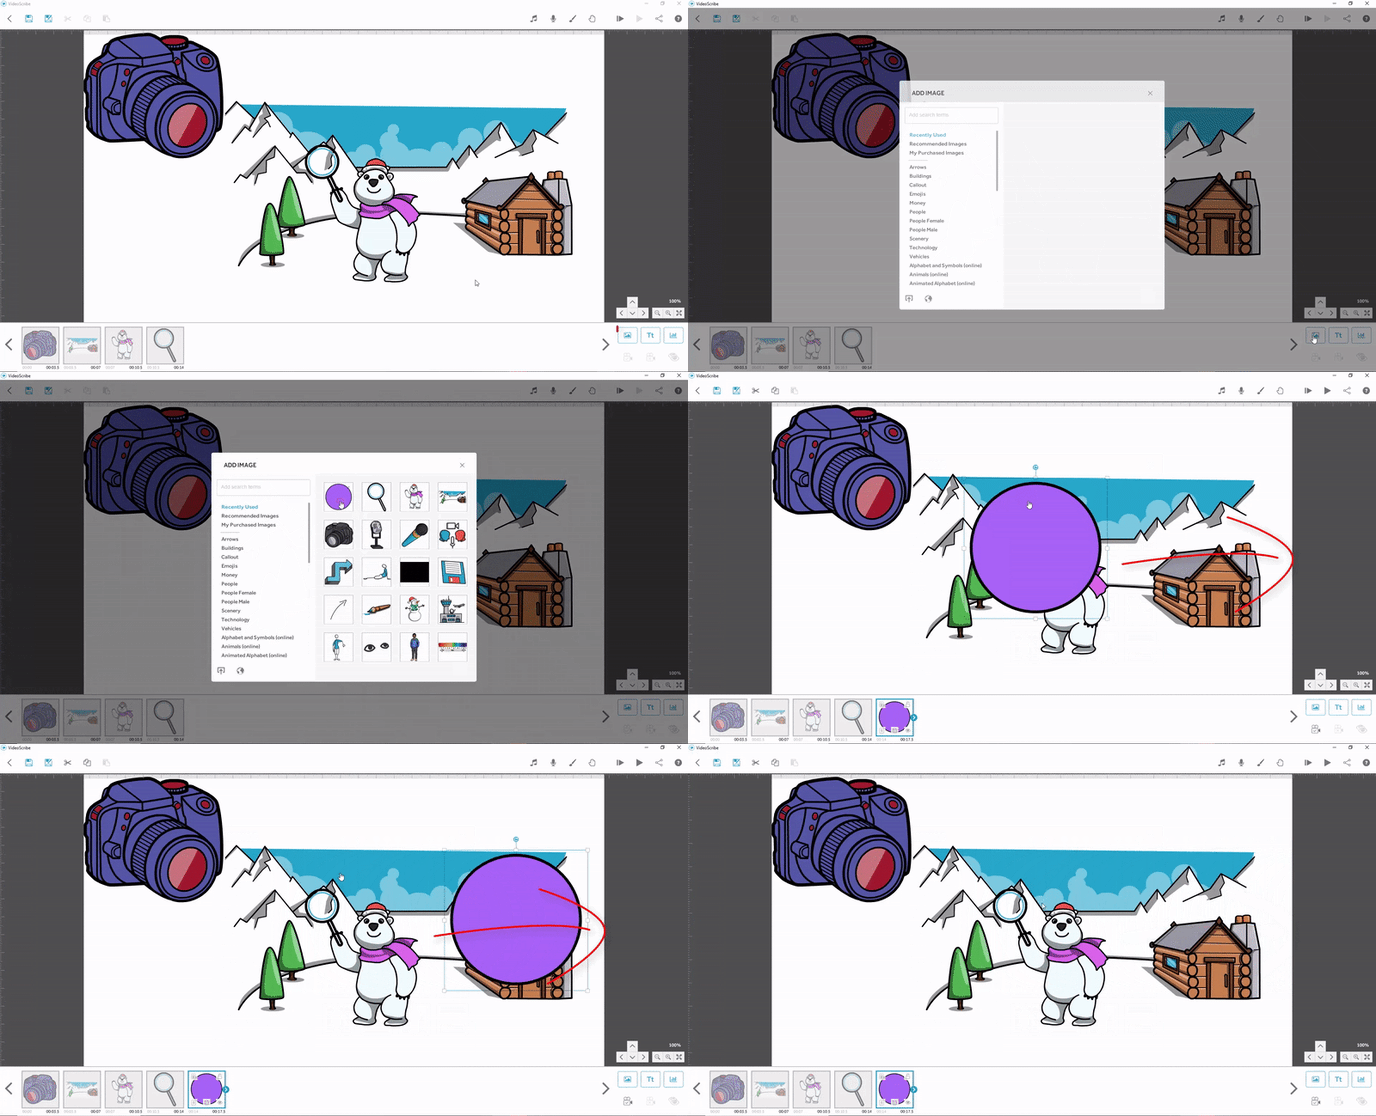
You can add the image with the camera zoomed out and with the element selected, use the arrow keys on your keyboard to move the image out of view. When it is out of view, click the set camera icon. You may wish to remove the hand for that element as well as the hand may be visible while the image is being drawn off-screen.
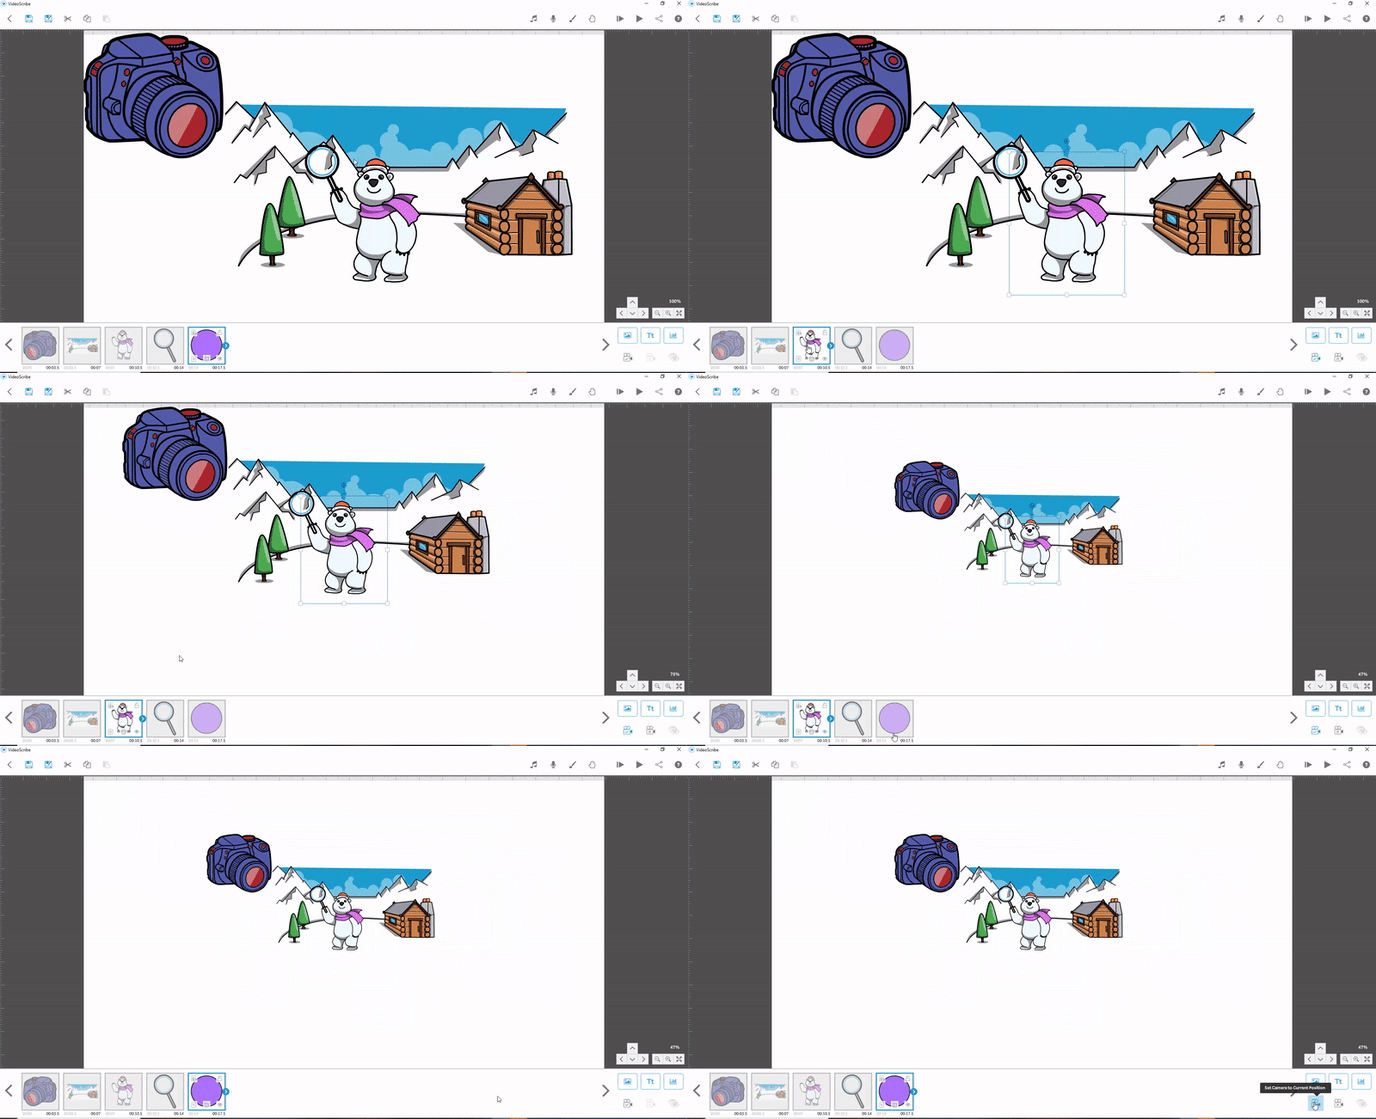
Step 3. With this new element selected set your view to the zoomed-out level that you want at the end of your scribe (make sure that you can see all your elements, but not the new element you have added) and save this camera position by clicking on the camera icon.
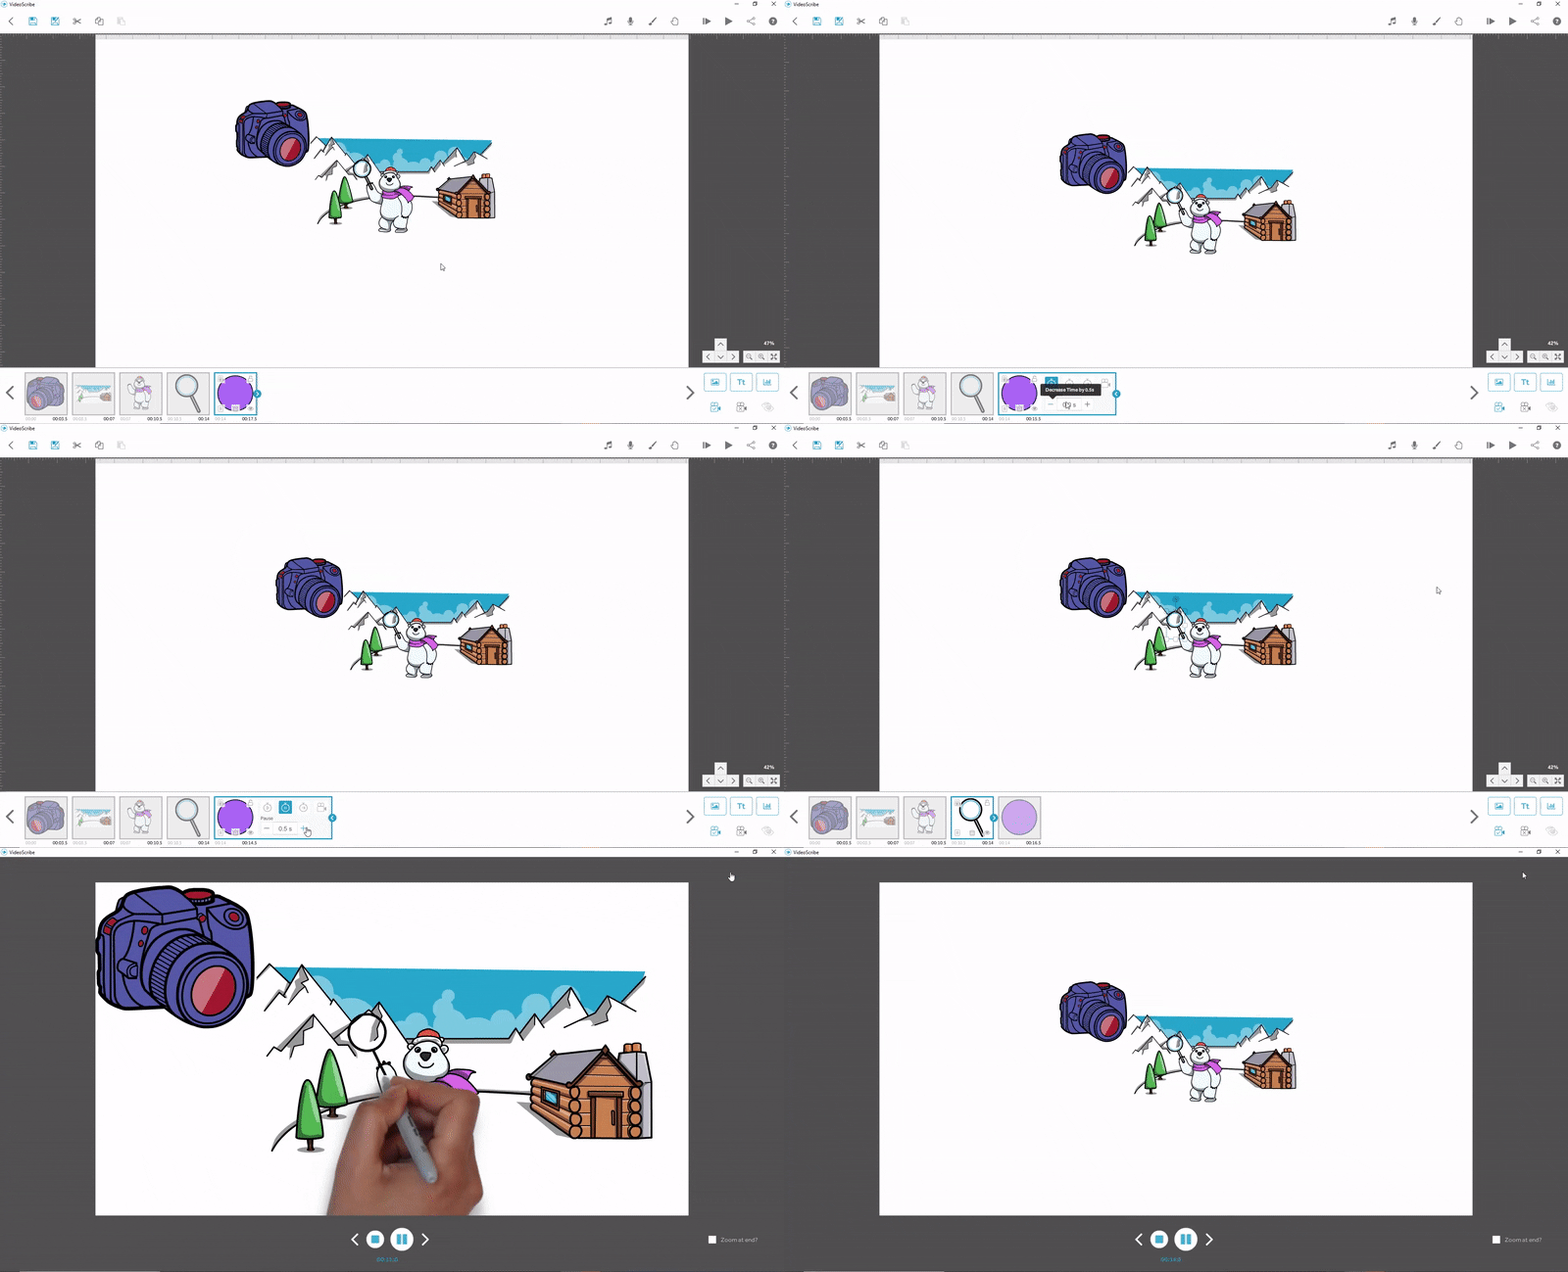
Step 4. Now you can open the image properties of the last element that you added, reduce the animation and transition time to 0 and make the pause length the duration that you want the final frame to hold for.
Tips for using the zoom function
- Zooming can be highly effective, especially when combined with morphing.
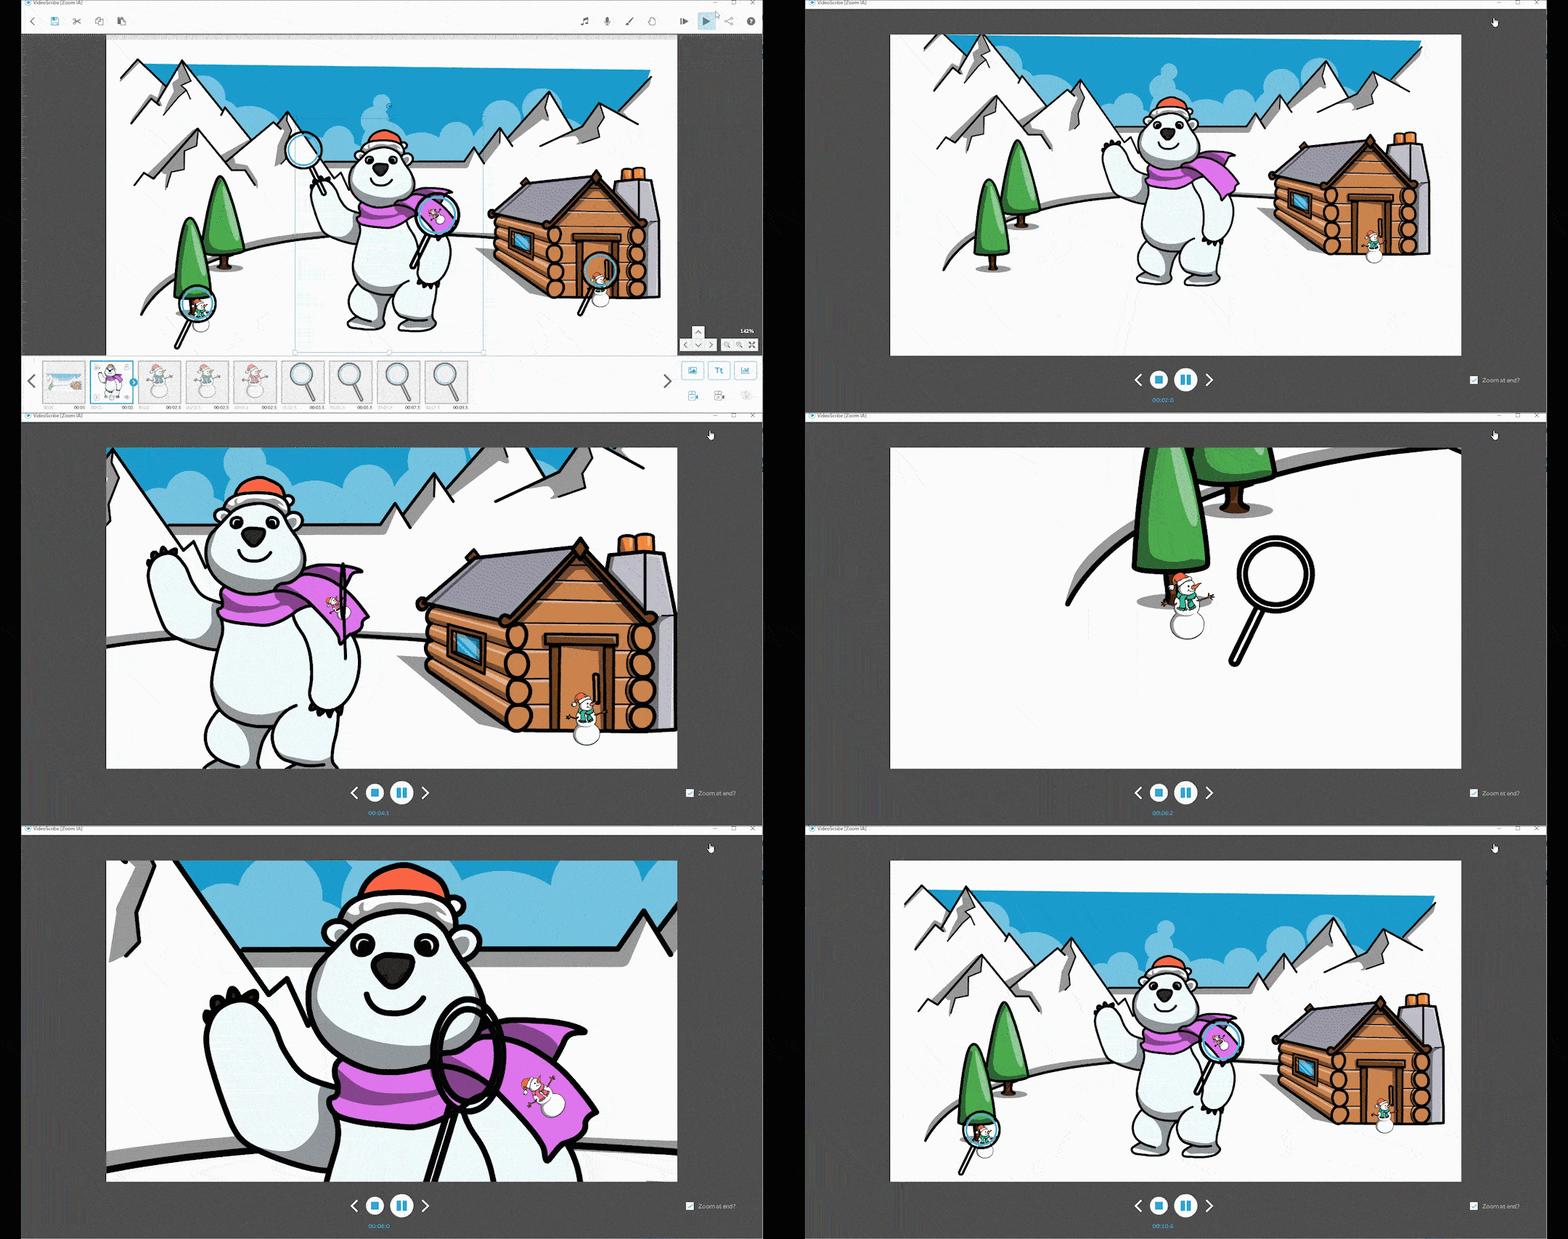
- You can set the camera for multiple elements to create different scenes.
- You can have multiple elements on the screen all set to the same camera position except one which is zoomed in more than the others. This creates a strong visual impression where the camera zooms in to the middle image and zooms out again.
- Use more of the canvas rather than zoom excessively. When you open a new scribe the zoom is already set to 100%. There is much more canvas available to use than you can see – click, hold and drag to scroll the canvas in any direction.
- Try and keep the zoom percentage reasonably close to 100% for most of the scribe and use occasional zooming to highlight. The zoom percentage is shown on the bottom right corner of the canvas.
- To view the camera position set for an element, double click the thumbnail from the timeline or select the element, right-click on that element on the canvas and choose 'View camera' from the menu.
