Timeline quick menu - VideoScribe Legacy
This article will show you the quick options that are available from the timeline in VideoScribe Legacy
Please note: VideoScribe Legacy is the older version of our software. We continue to support it, but we recommend switching to the latest version to enjoy the best features and performance.
If you are using the latest version of VideoScribe click here to read the article on Using the timeline (latest version).
The timeline thumbnail of a text or image element can be in 2 different states - collapsed and expanded.
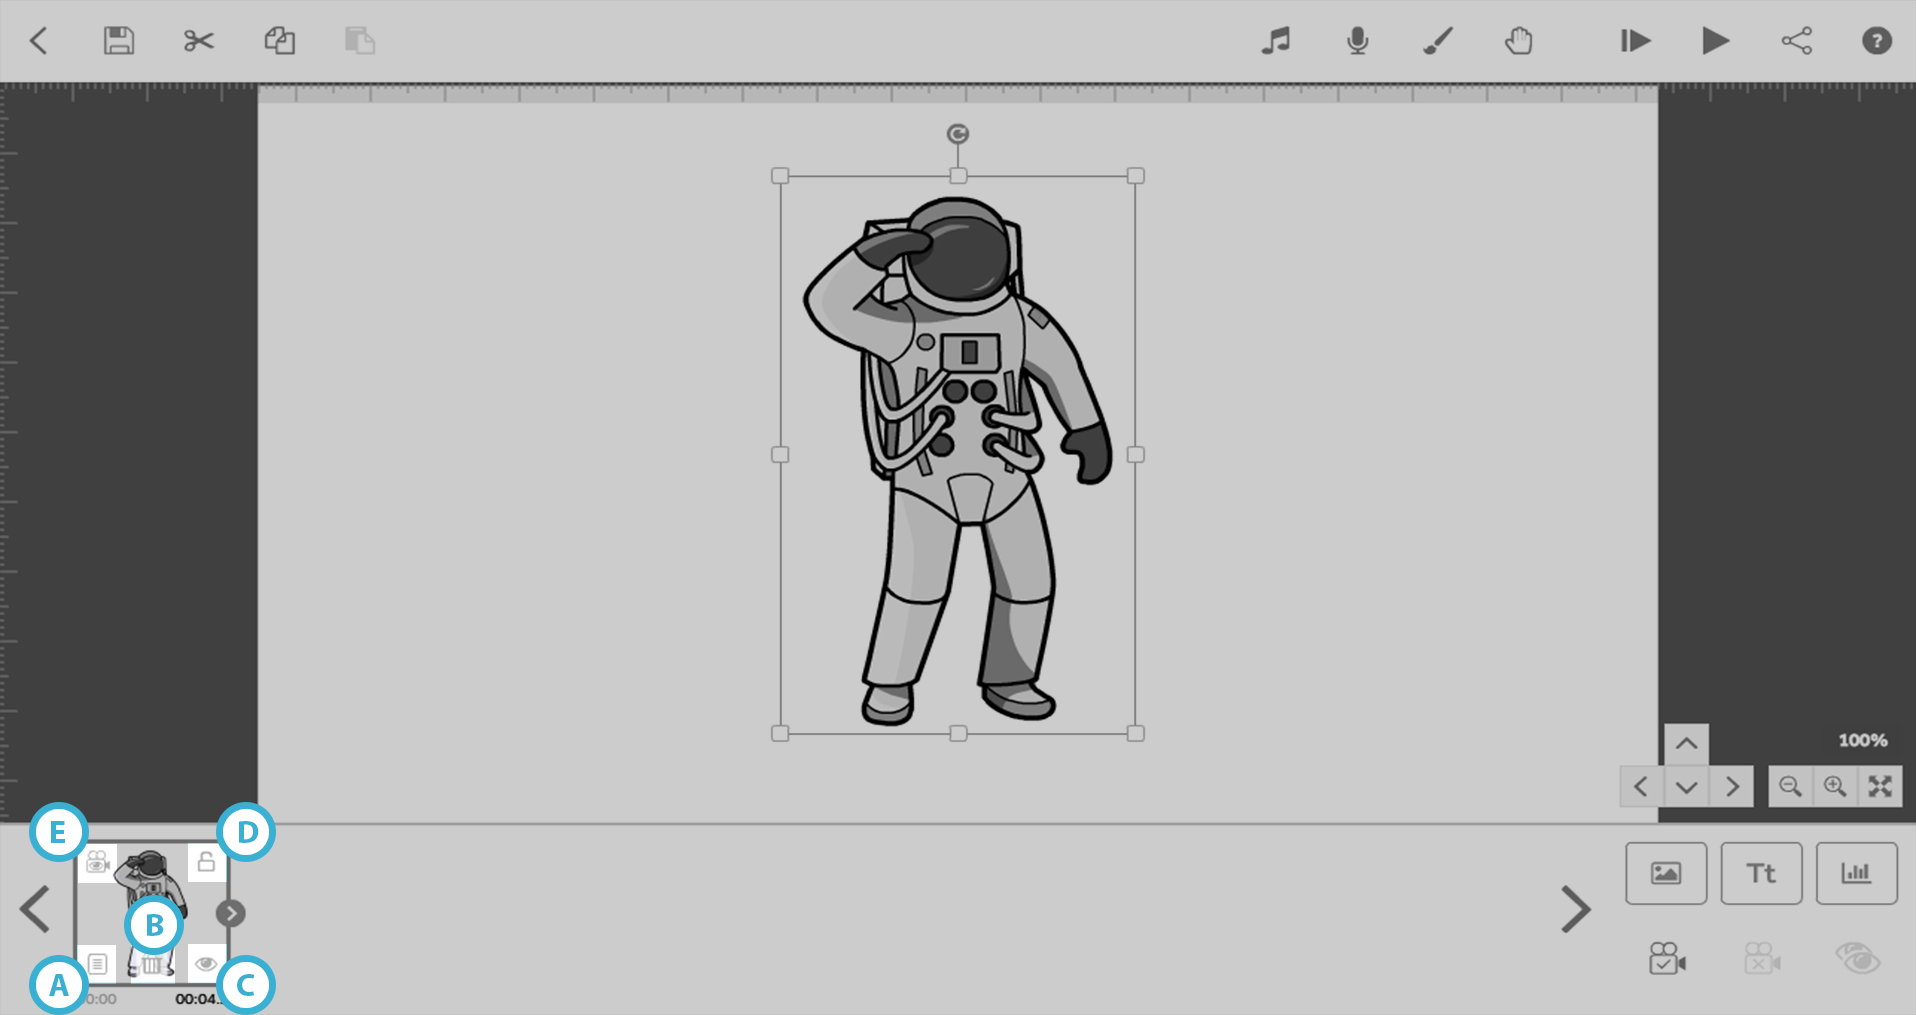
When it is collapsed there are five icons on the timeline thumbnail:
• (A) Element Properties - This opens the properties box for this element to allow you to edit any of the settings
• (B) Delete Element - This will allow you to delete the element, you will get a confirmation before it’s removed just to make sure you do not delete anything accidentally
• (C) Hide Element - This will hide the element on the canvas and grey it out on the timeline. The button will switch to Show Element when activated so you can bring the element back again
• (D) Lock Image - This will allow you to Lock the element in place on the canvas and in the timeline to stop you from accidentally moving or adjusting it
• (E) View Elements Camera Position - This will move the canvas to the camera position that element will be drawn from
In addition to these options, you can also be double-click on the thumbnail to view the elements camera position.
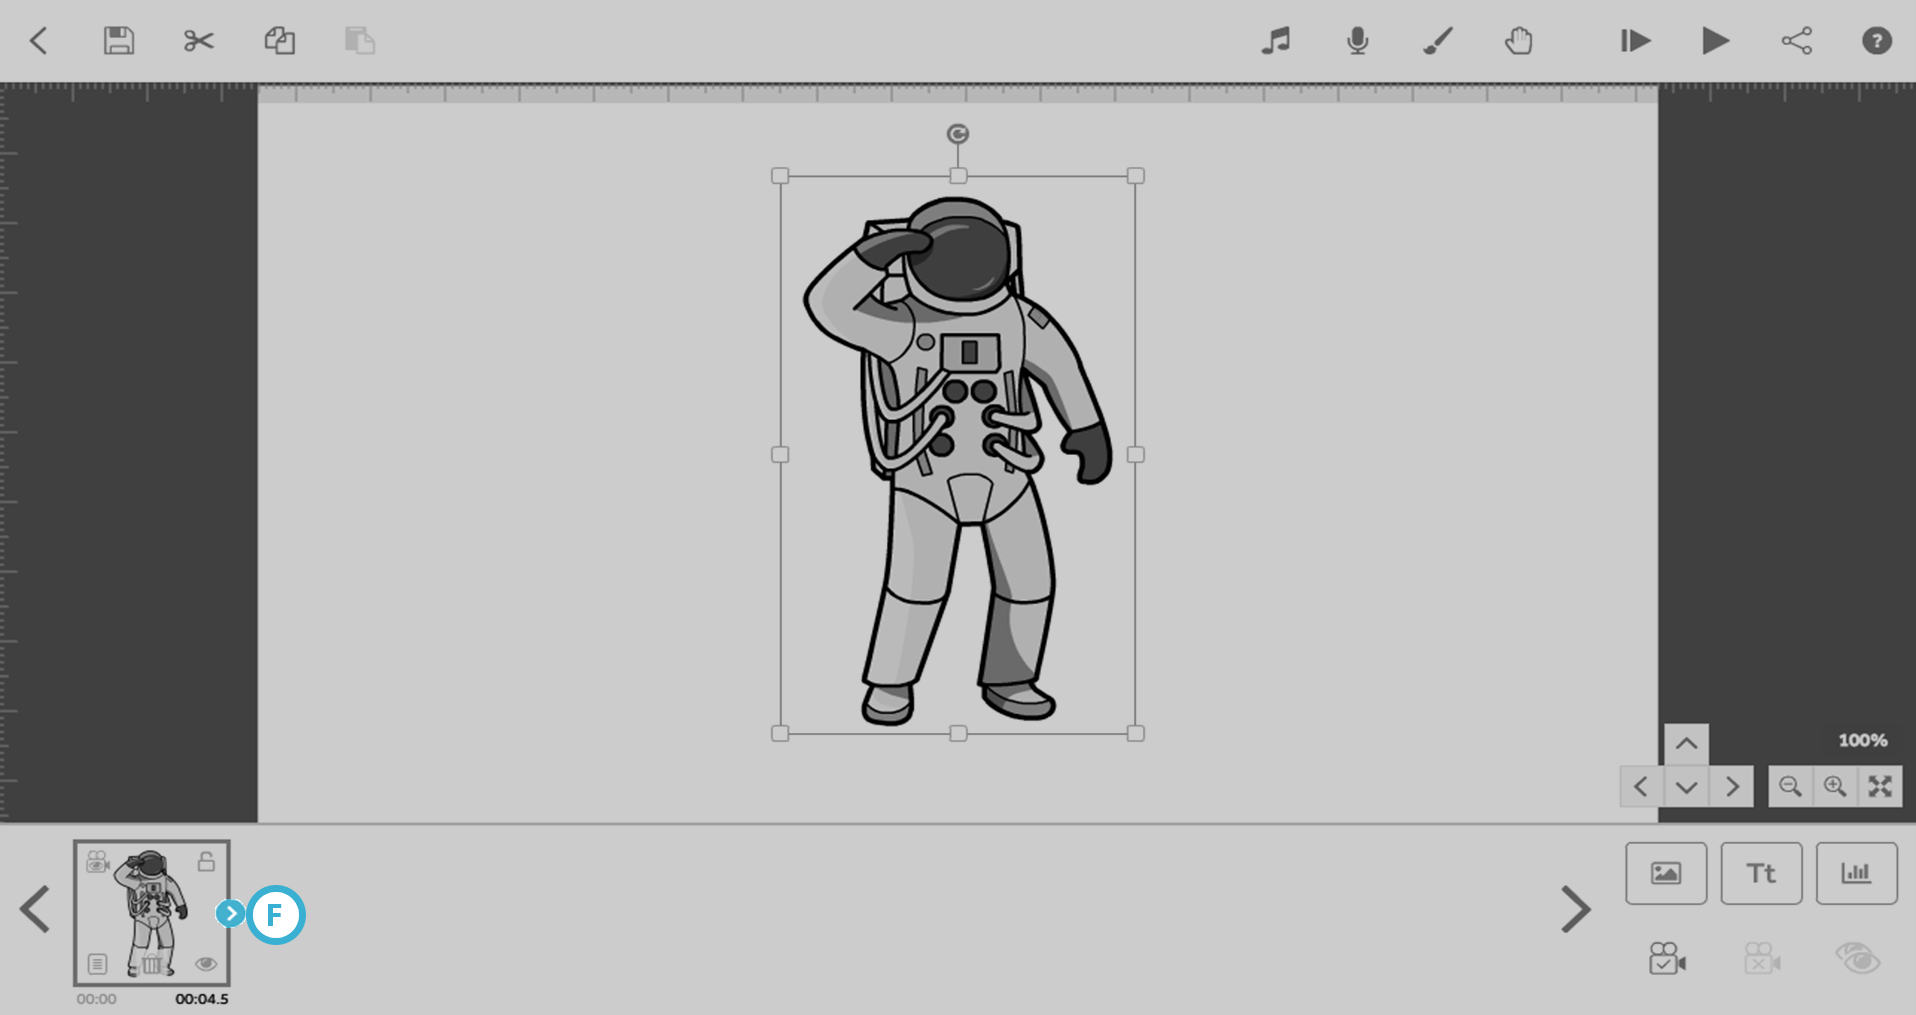
You can expand the quick menu using the blue arrow on the right edge of the box (F). When the timeline thumbnail is expanded the icons above are still visible and you will also see options to change the Animate, Pause and Transition times and the Camera settings.
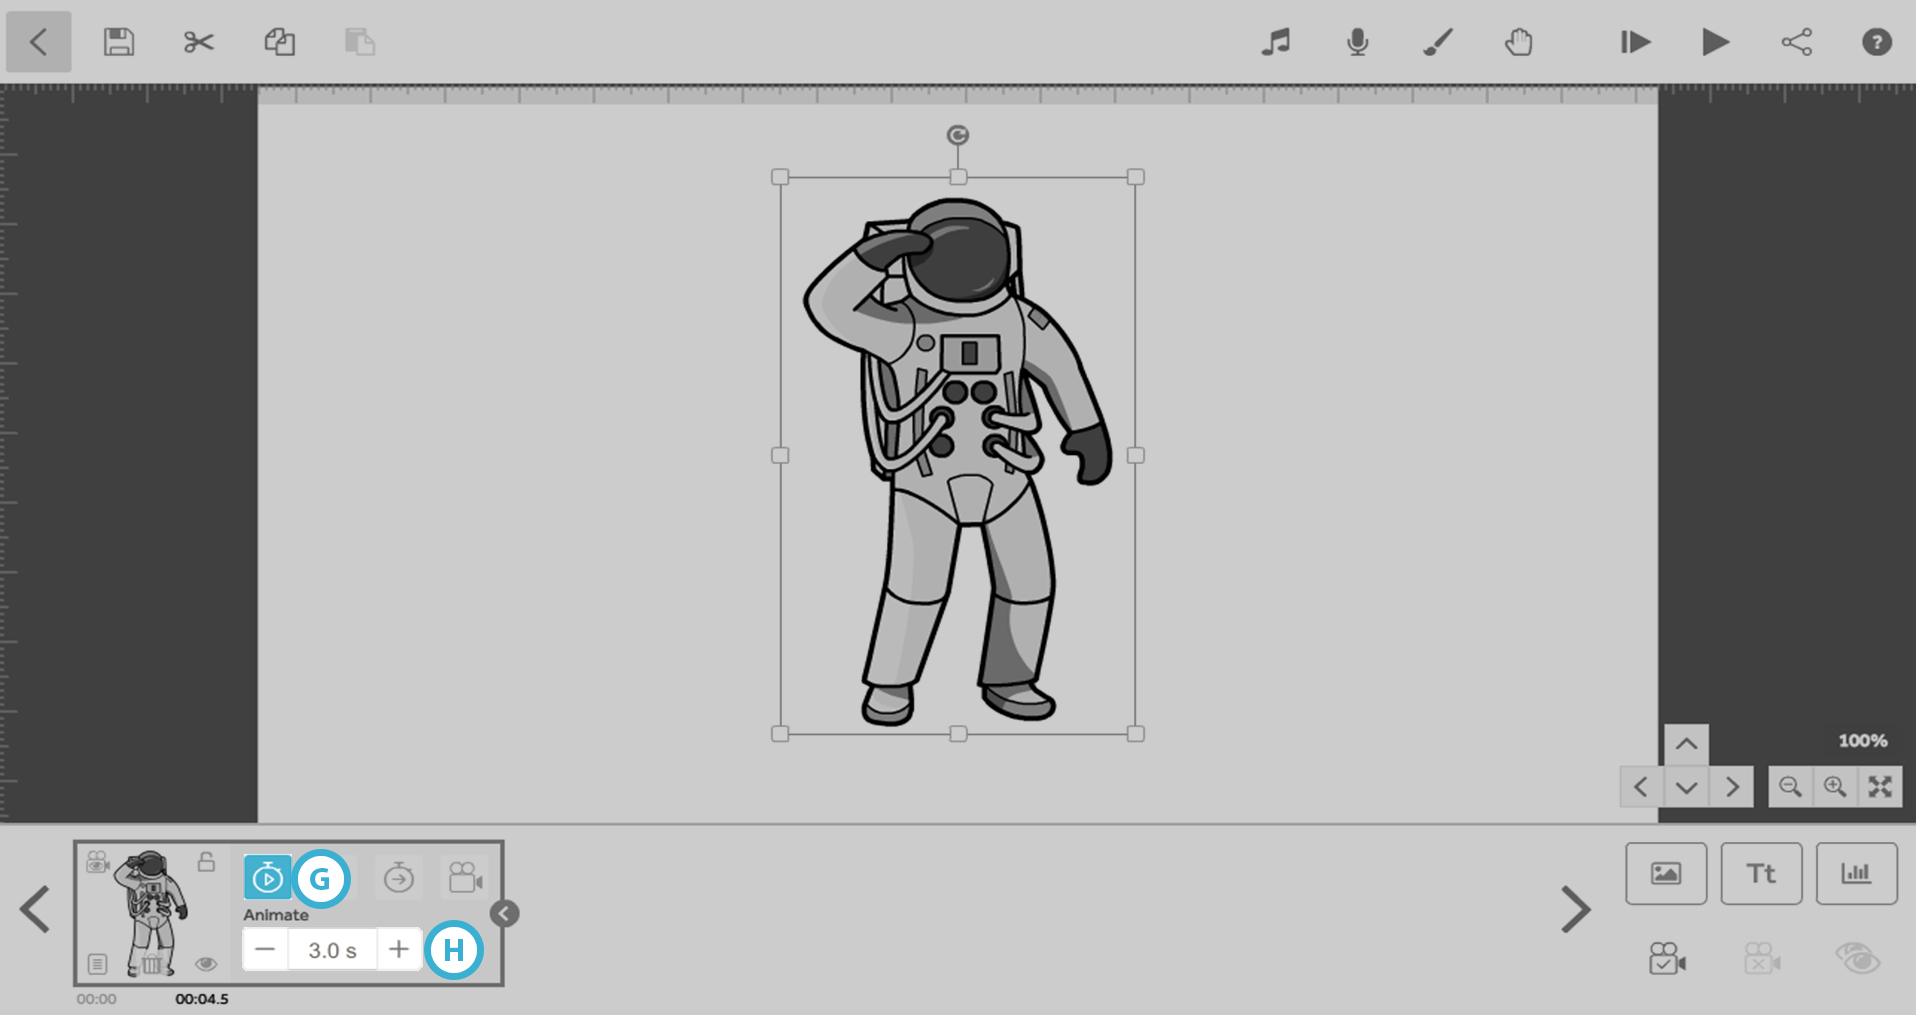
When the Animate icon is selected (G), the animate time can be increased and decreased using the plus and minus icons (H). The animate time is the amount of time the element will take to be drawn, moved, faded or morphed onto the canvas.
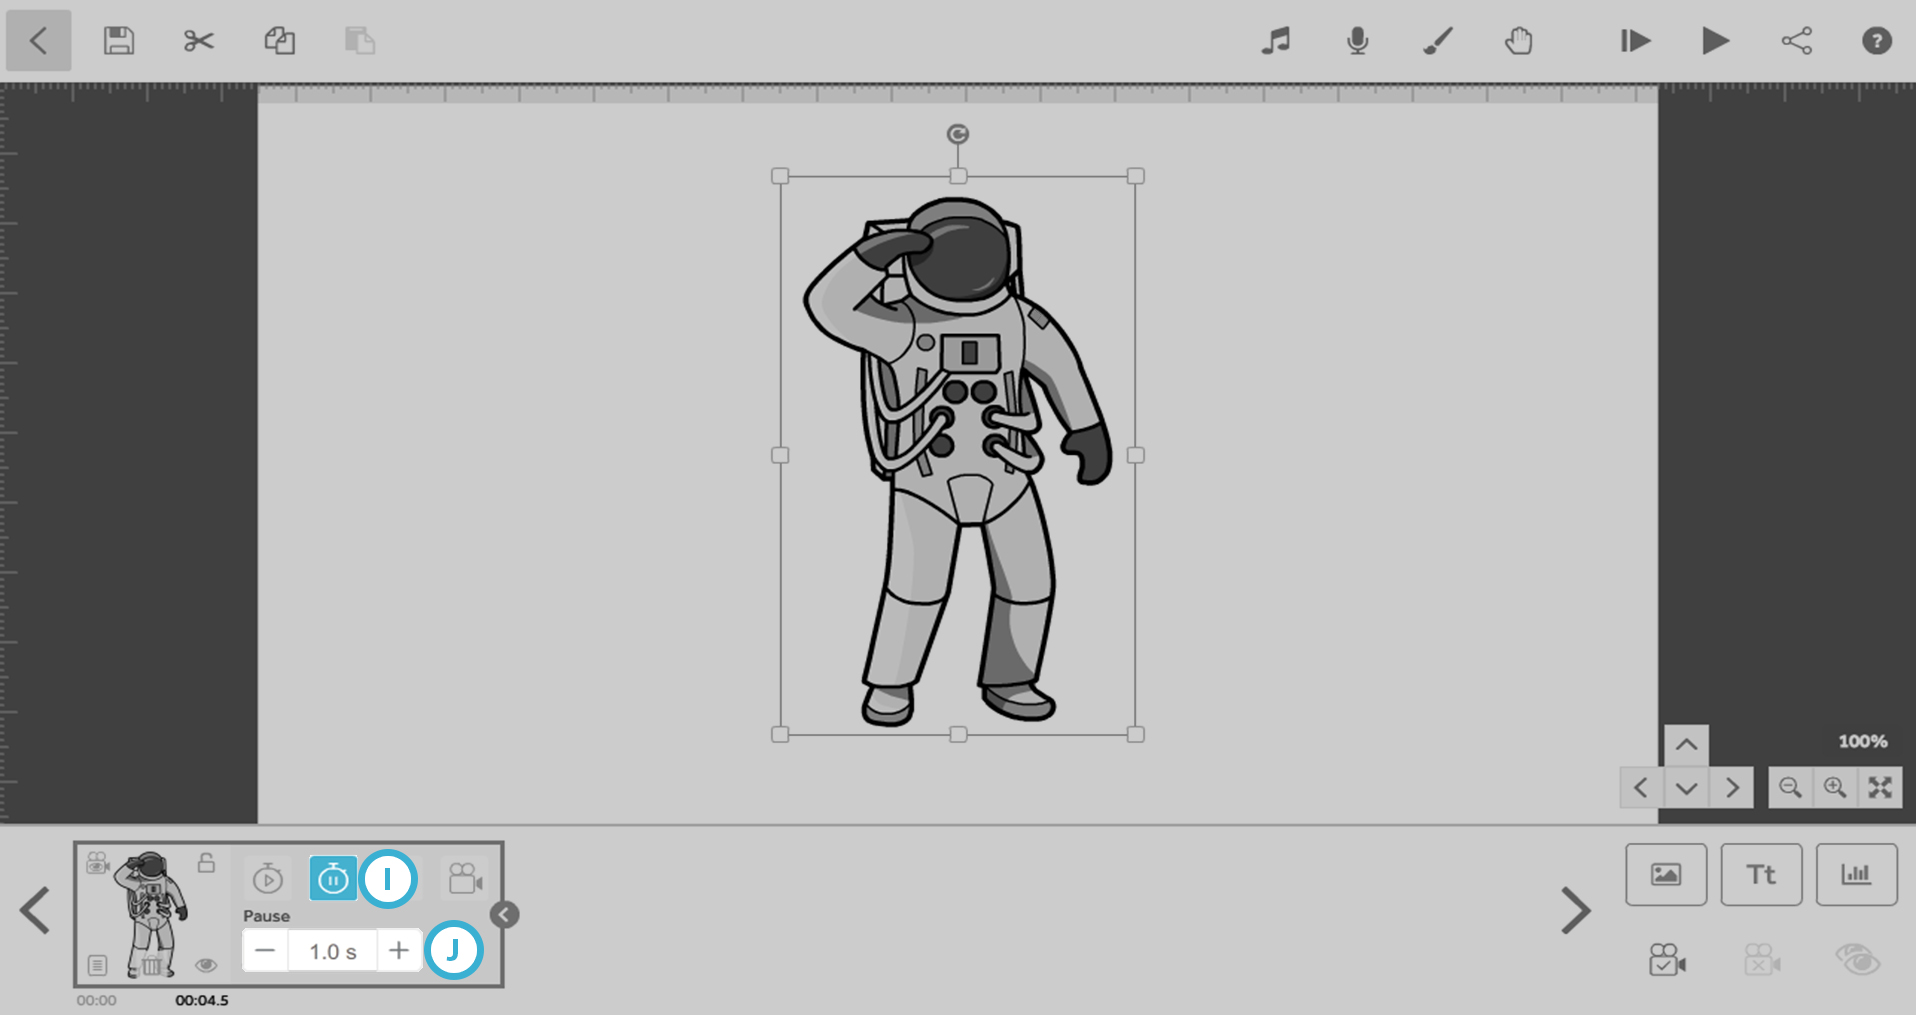
When the Pause icon is selected (I), the pause time can be increased and decreased using the plus and minus icons (J). The pause time is the amount of time the camera stays on the current element after it has been drawn.
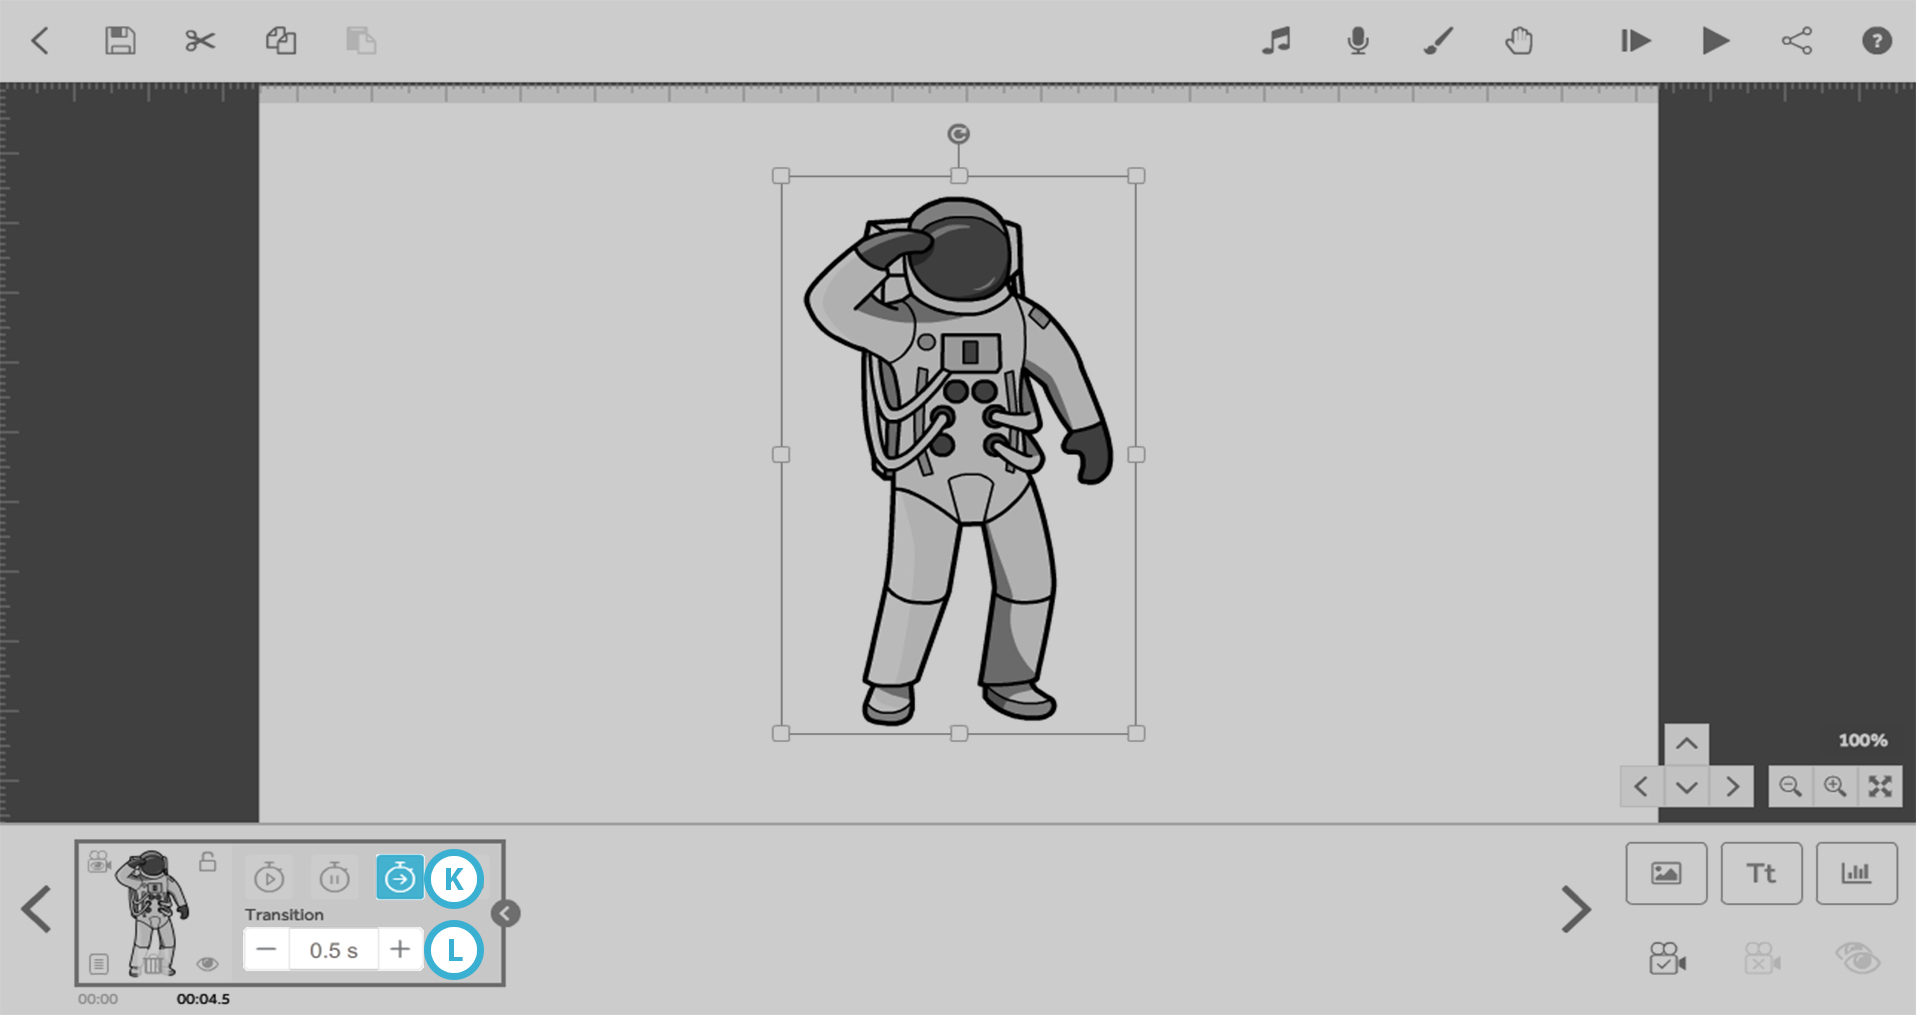
When the Transition icon is selected (K), the transition time can be increased and decreased using the plus and minus icons (L). The transition time is the time it takes for the camera to move from the current element to the next.
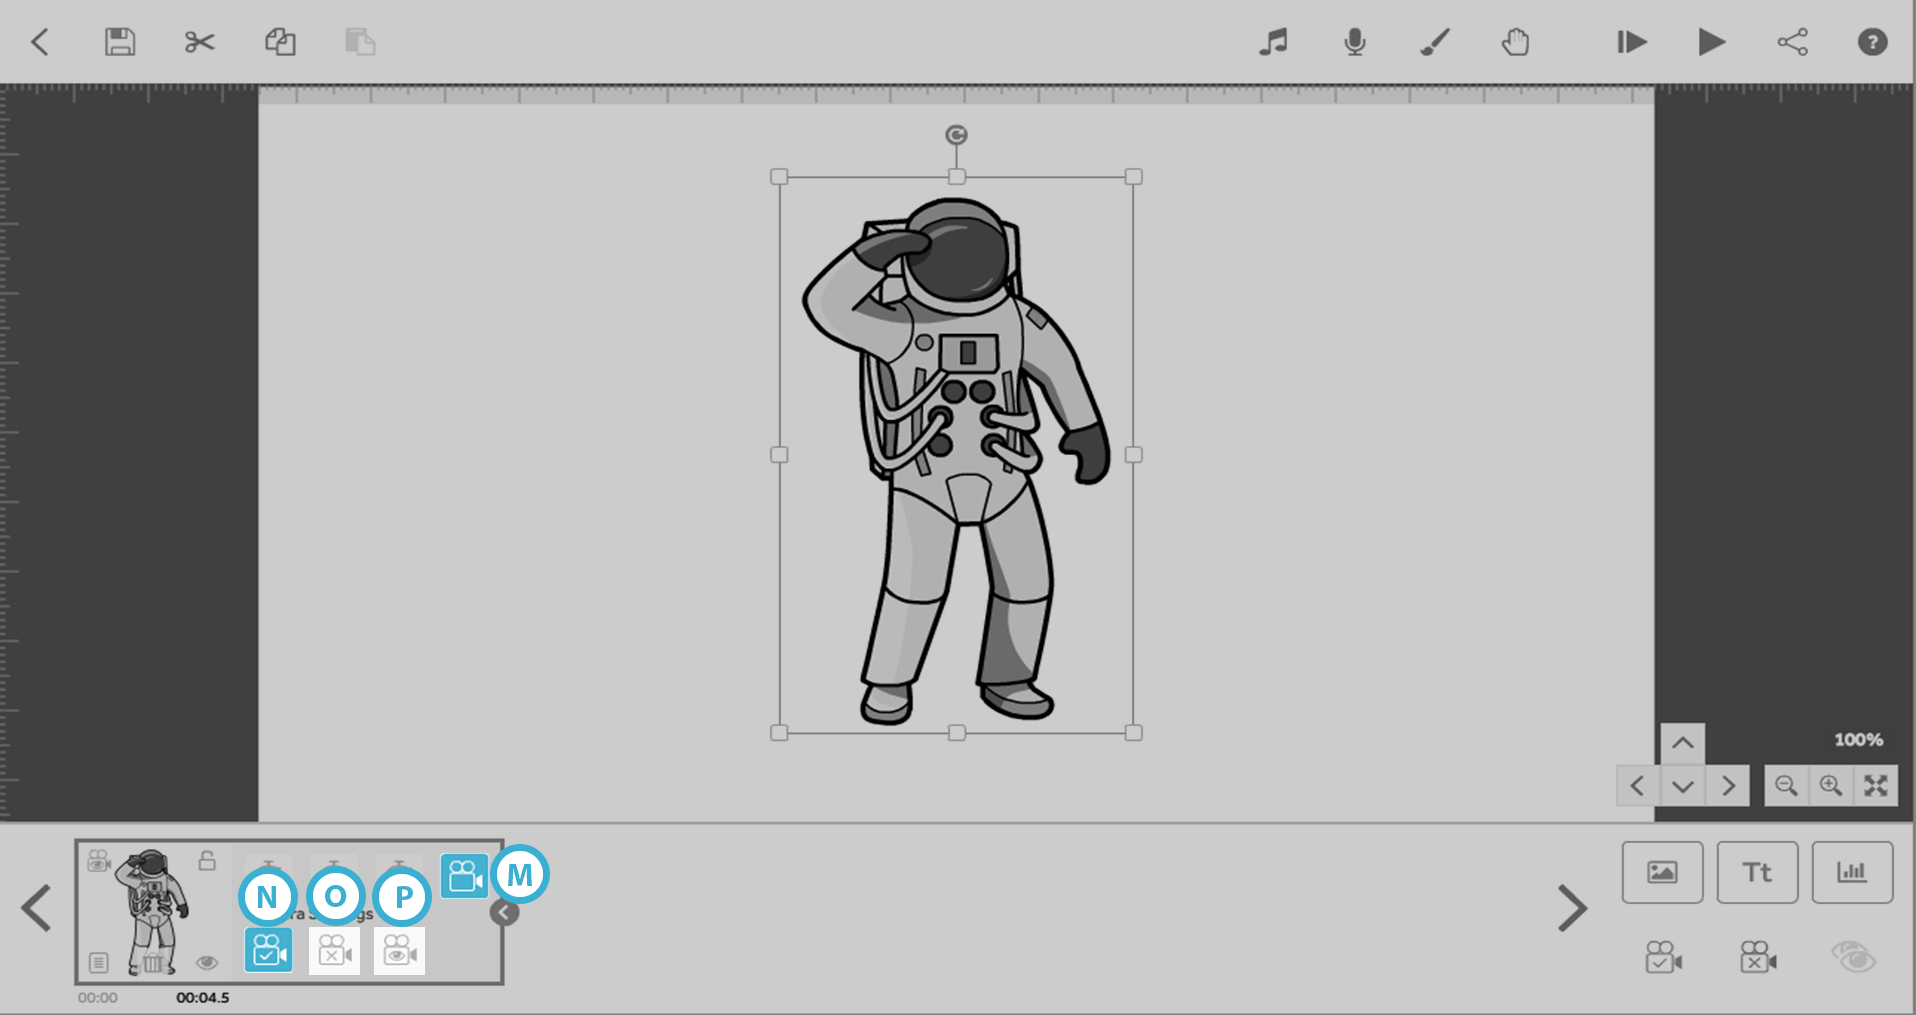
When the Camera Settings icon is selected (M), you can set the current camera position for the element (N), remove the camera position that is set for the element (O) and view the camera position that is set for the element (P).
If a camera position has already been set for the element, the set camera icon will be blue. If no camera position is set for the element, the set camera icon will have a white background and the remove camera position icon will be inactive. The element will have the default camera position set for it.
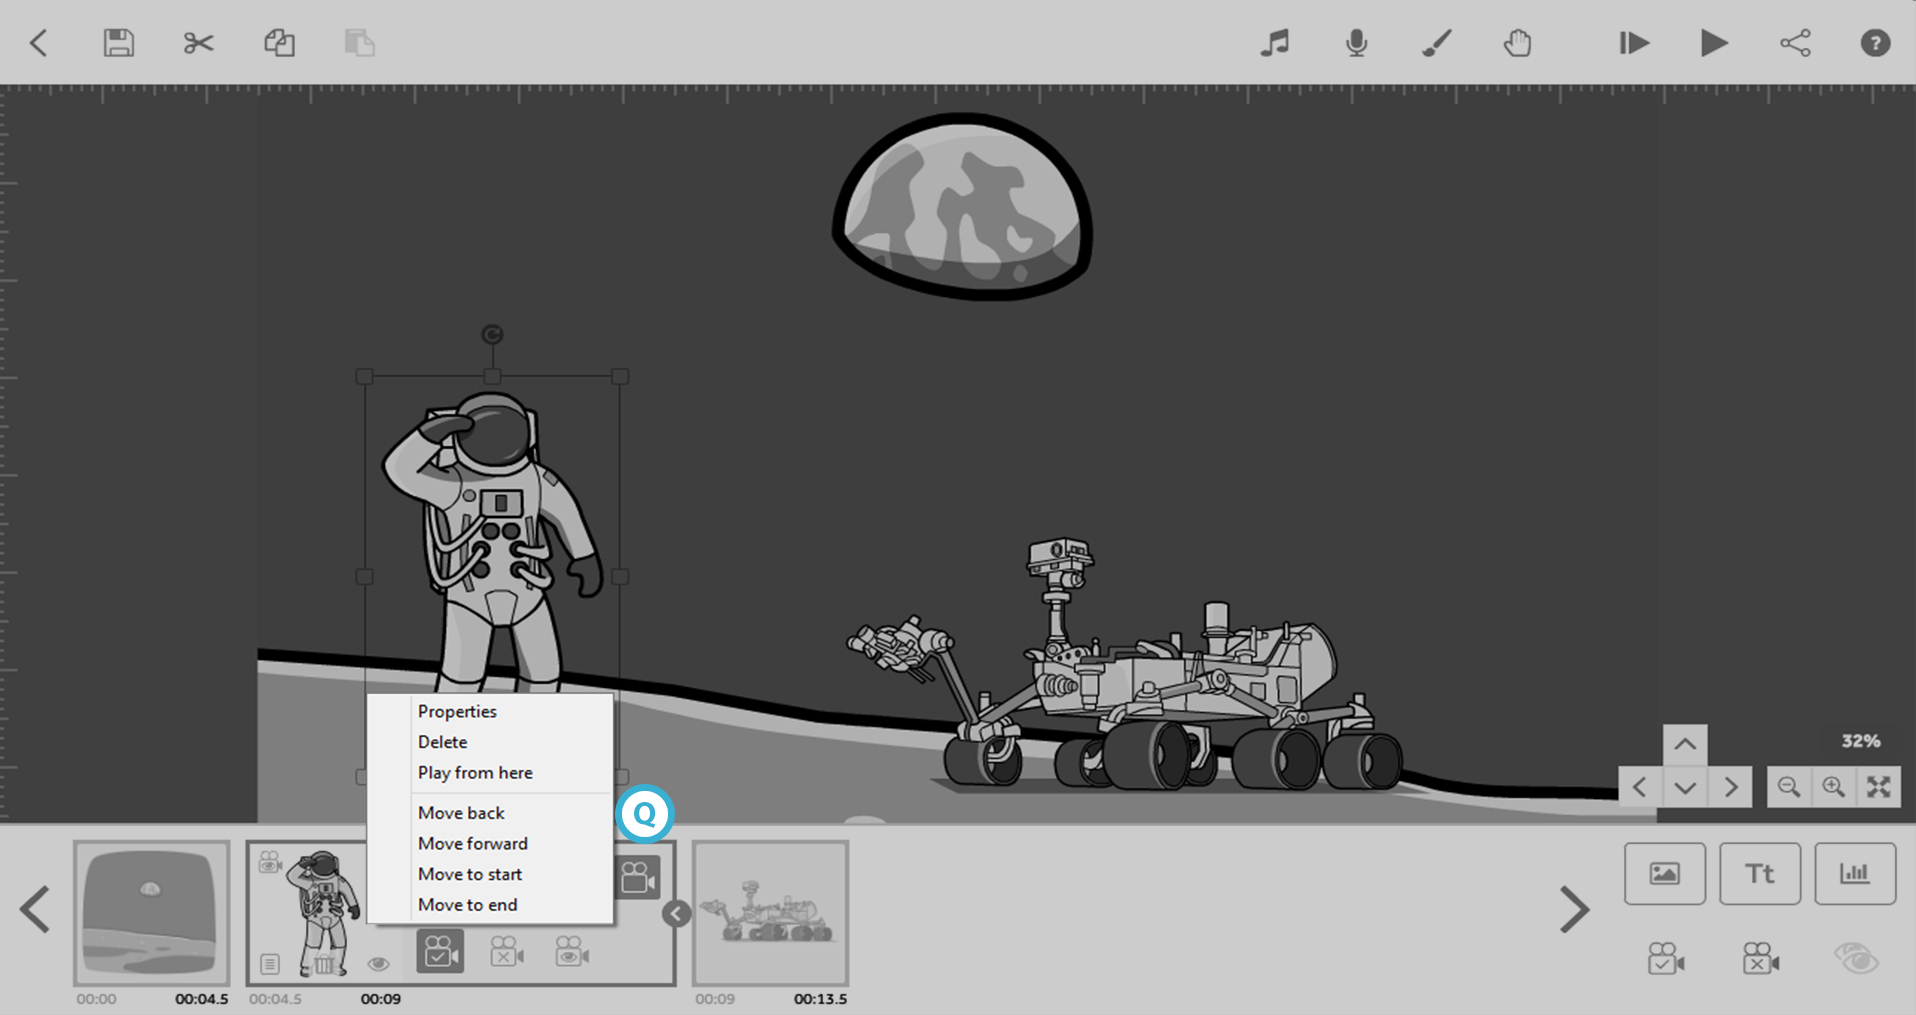
You can right-click on the timeline thumbnail to reveal some more options (Q). From this menu, you can open the element properties, delete the element, play the scribe from that element, move the element back one place in the timeline, move the element forward one place in the timeline, move it to the start of the timeline and move it to the end of the timeline.
